
Installation Steps for Windows
1. Login into Applicare console and navigate to the Download Agents screen.
2. Click the SingleAgentWindows button to download the agent. This will download the ApplicareSingleAgentWindows.zip file. Copy ApplicareSingleAgentWindows.zip file to the machine where the agent will be deployed.
3. Extract the contents of ApplicareSingleAgentWindows.zip file into a directory named ApplicareSingleAgentWindows.
4. Open a command prompt in administrator mode, navigate to the ApplicareSingleAgentWindows\agentscripts directory and run the createAgentTask.bat file.
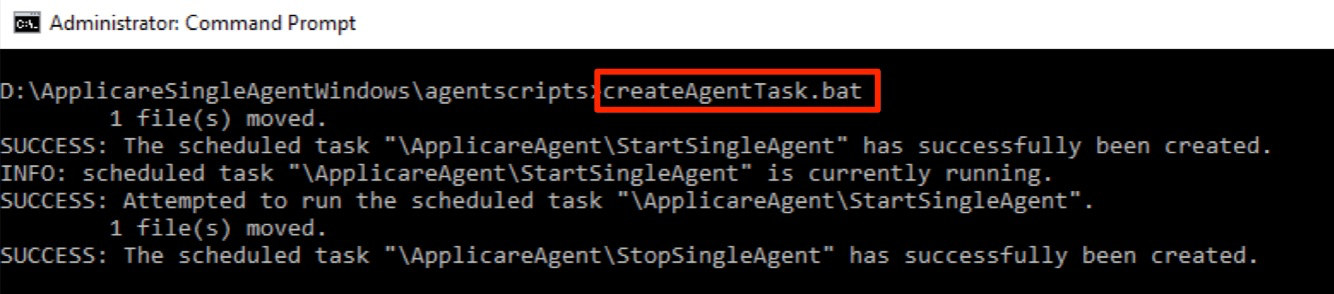
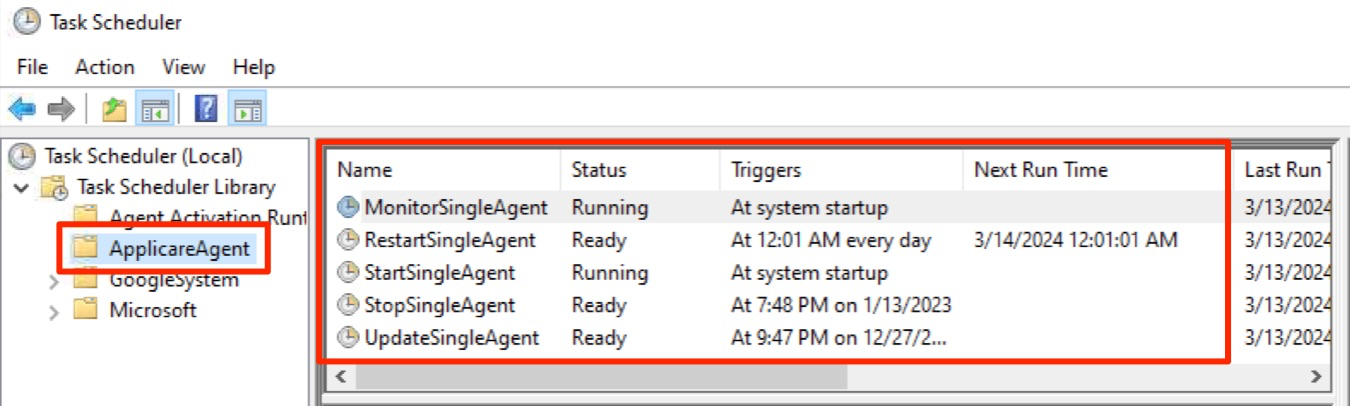
The SingleAgent will be installed as a task and will run by default. To view the task, open Task Scheduler, expand Task Scheduler Library and select the ApplicareAgent folder. You will see two tasks will be listed there.
- SingleAgent - Run this task to start the SingleAgent. After installation, the agent will run by default.
- StopSingleAgent - Run this task to stop the SingleAgent.
For Other Docs - Click here