Create a new user with the root role for that new user.
Syntax:
use admin
db.createUser({ user: "USERNAME", pwd: "PASSWORD", roles: [ { role: "root", db: "admin" } ] })
Example:
use admin

db.createUser({
user: "applicare",
pwd: "applicare123",
roles: [ { role: "root", db: "admin" } ]
})
Step 1: Install Applicare SingleAgent in the machine where MongoDB is running by following the provided installation steps.
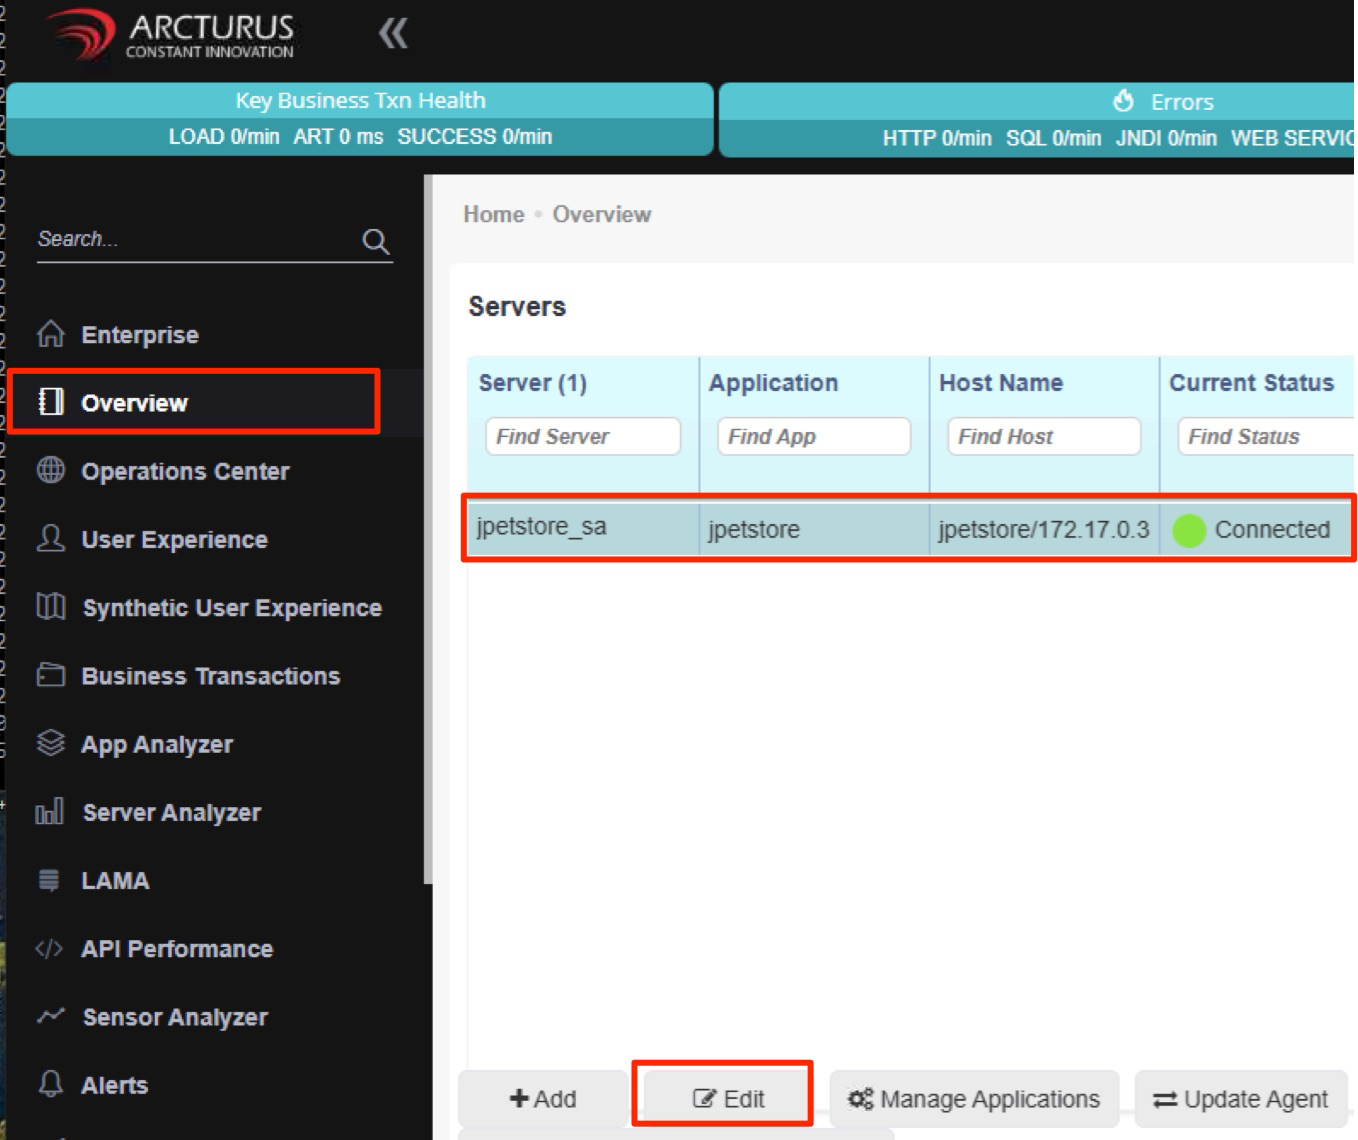
Step 2: Select the newly added agent and click the Edit button.
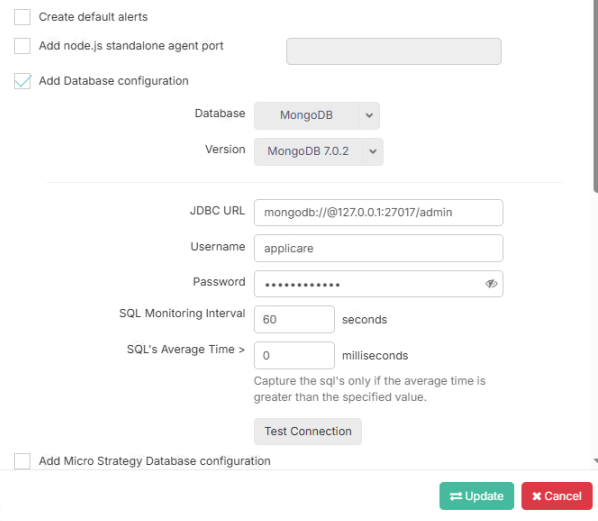
Step 3: Check the "Add Database Configuration" checkbox, choose "MongoDB" from the Database dropdown, and Select your MongoDB server version from the Version dropdown. If the version is not listed in the dropdown then select the most recent version available.
Step 4: Enter the JDBC URL, Username and Password then click the update button.
Checking the Test Connection option is not mandatory. This test verifies the connection from controller machine to the agent machine.
Sample JDBC URL
Syntax: mongodb://@[ip]:[port]/[database]
Eg: mongodb://@127.0.0.1:27017/admin
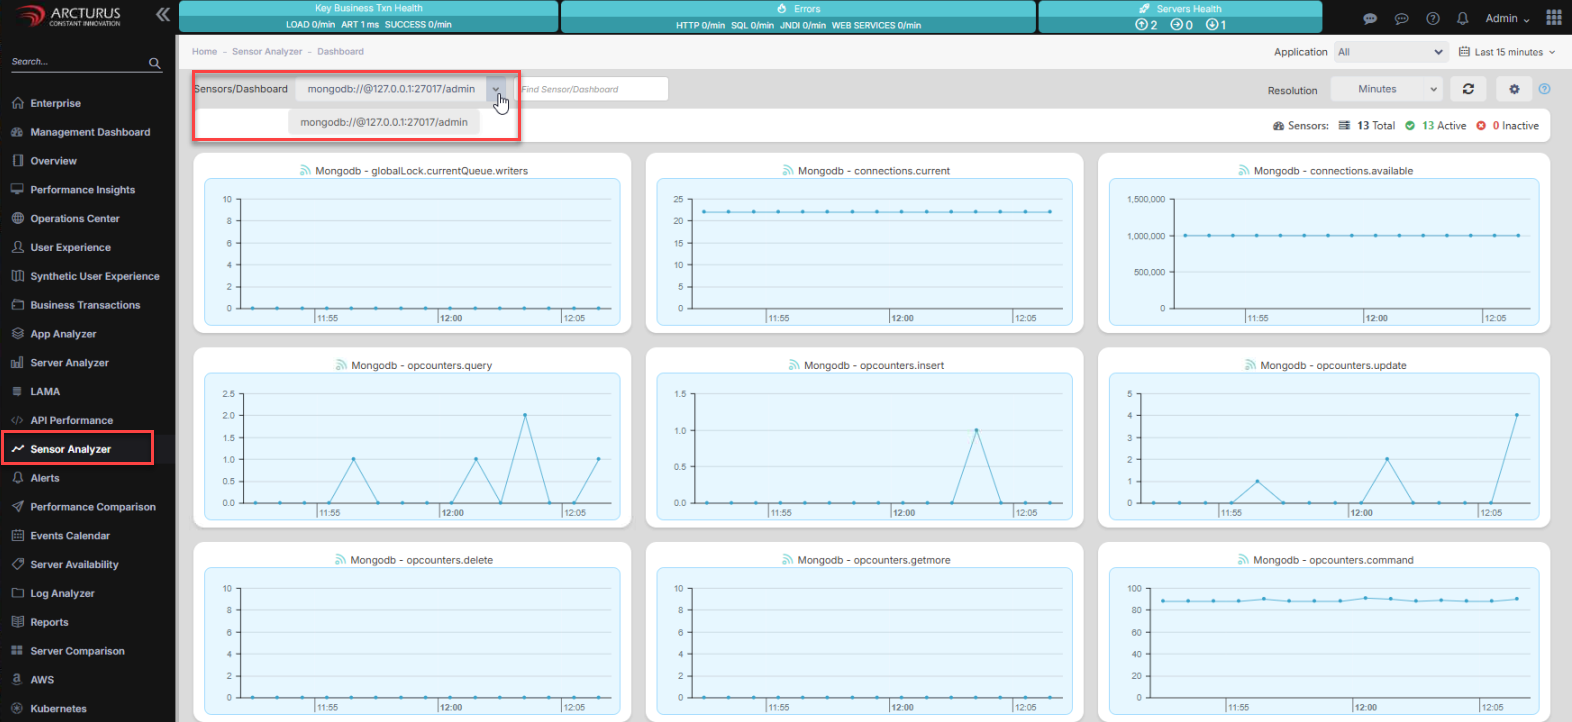
Step 4: To verify the MongoDB data, go to the Sensor Analyzer screen in the left-hand menu and select MongoDB connection string in the sensor dashboard drop down.