
1. Login into Applicare console and navigate to Download Agents screen.
2. On the target machine, use either WGET or CURL installer command, depending on which is available to deploy the agent.
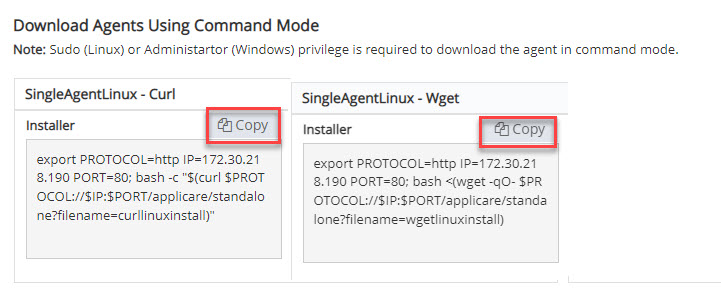
3. Paste the copied command into the terminal window and press Enter to begin the installation process.

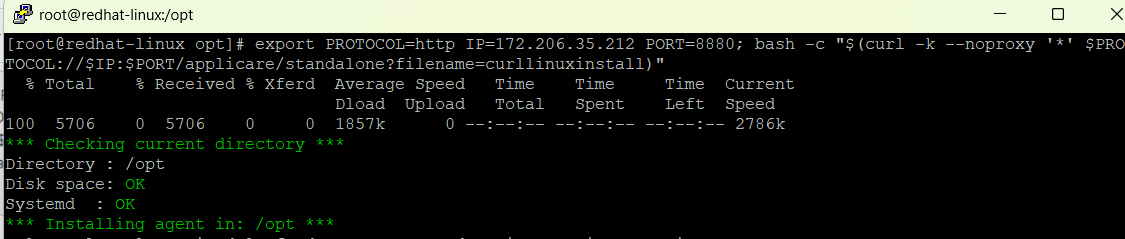
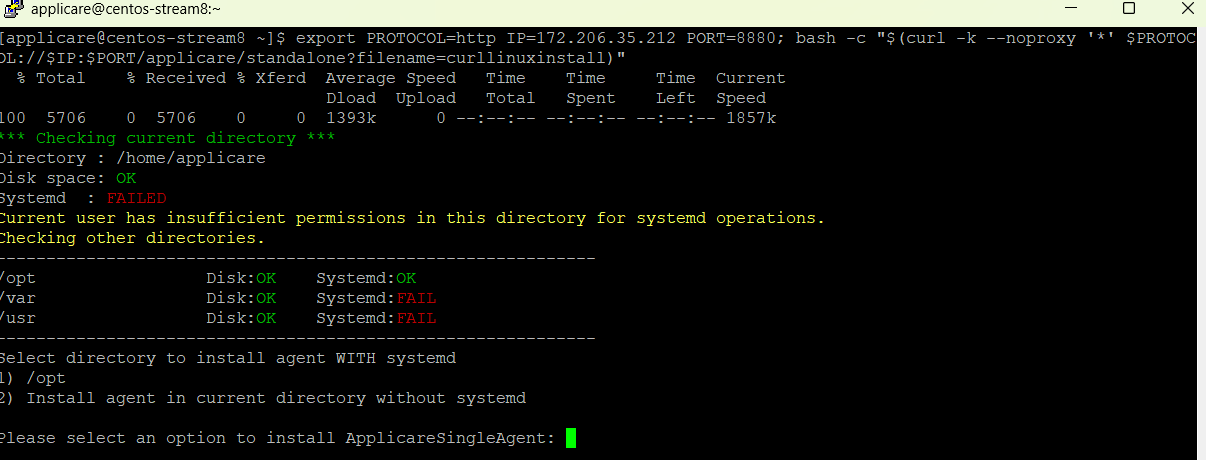
4. The script automatically validates the environment by checking for minimum of disk space, verifying directory write permissions, and confirming whether the current user has permission to perform systemd operations.
If all requirements are satisfied, the agent is installed in the current directory and configured to run as a systemd service. If systemd permissions or disk space are insufficient, the script displays a list of alternative directories (such as /opt, /var, or /usr) that meet the requirements. Select one of these options, or choose to proceed with installation in the current directory without systemd, in nohup mode.
5. To complete the setup, enter “y” to start the SingleAgent for standard monitoring, or enter “n” if you are monitoring Java-based applications such as Tomcat, JBoss, WildFly, WebLogic, or WebSphere.
