
Set up the .NET agent to run automatically using Task Scheduler

Step 1: To initiate the .Net Agent with Task Scheduler. Navigate to the Agent's installation home directory, open a command window as an administrator mode and run the createDotNetAgentTask.bat file.
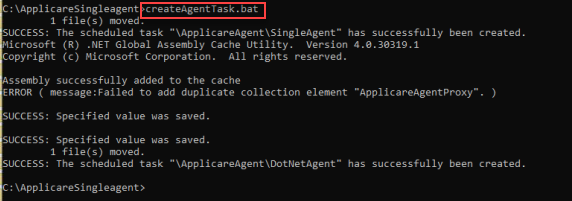
Screenshot 1 — Set up the Dotnet agent to run automatically using Task Scheduler

Step 2: Open Task Scheduler, expand the Task Scheduler Library and then select the ApplicareAgent Folder.
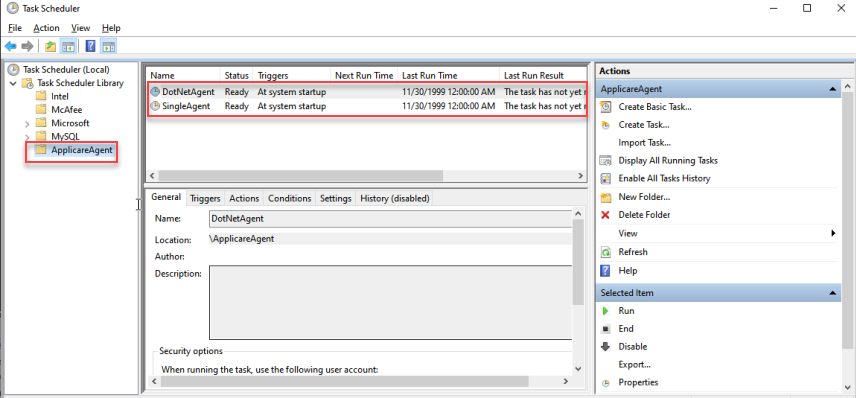
Screenshot 2 — Set up the Dotnet agent to run automatically using Task Scheduler

Step 3: Right-Click the DotnetAgent task and choose Properties.
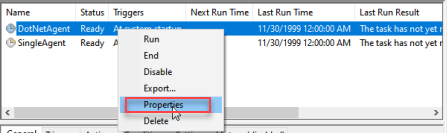
Screenshot 3 — Set up the Dotnet agent to run automatically using Task Scheduler

Step 4: Select the Option to Run whether user is logged on or not and then click OK.
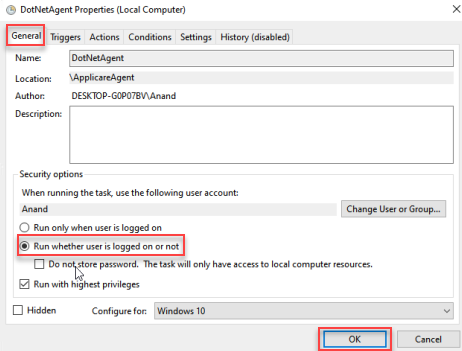
Screenshot 4 — Set up the Dotnet agent to run automatically using Task Scheduler

Step 5: Enter the User name and Password and click OK.
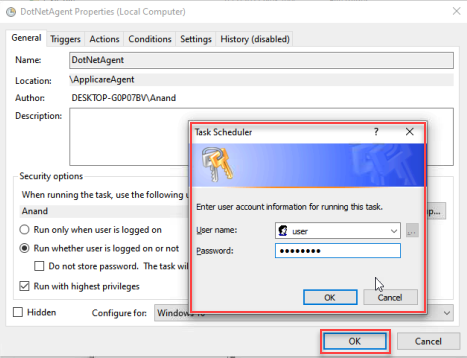
Screenshot 5 — Set up the Dotnet agent to run automatically using Task Scheduler

If you encounter error 2147943712 while saving the password. Refer here

Step 6: Right-click the DotnetAgent task and choose Run.
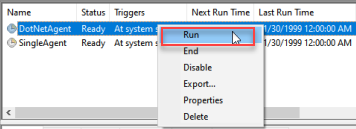
Screenshot 6 — Set up the Dotnet agent to run automatically using Task Scheduler

Step 7: Repeat Steps 3,4,5 and 6 for the SingleAgent task in Task Scheduler.
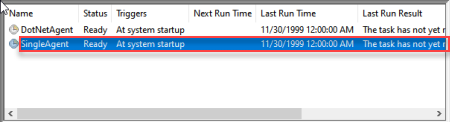
Screenshot 7 — Set up the Dotnet agent to run automatically using Task Scheduler

Monitoring with Applicare

Was this article helpful?

Votes and follows are kept by Zendesk, so they need a Help Center account. These buttons open this article there.

Opens Zendesk · needs internet and sign-in

Still stuck? Contact support