
User Creation
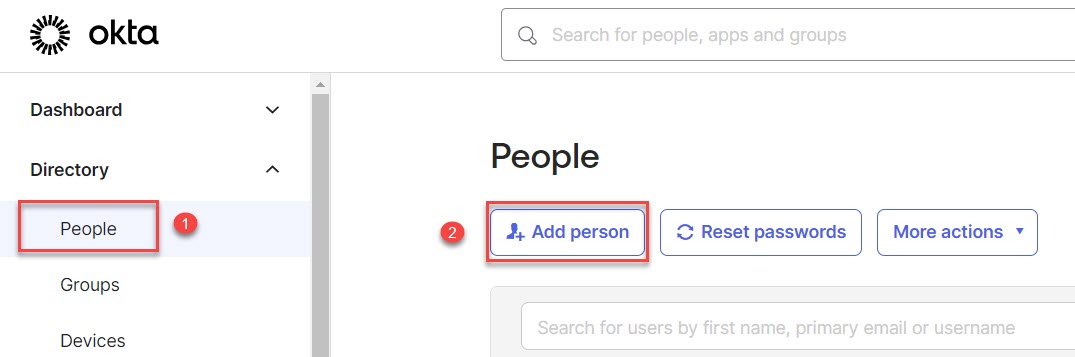
1. Log in to your OKTA Admin account and select People from the Directory menu.
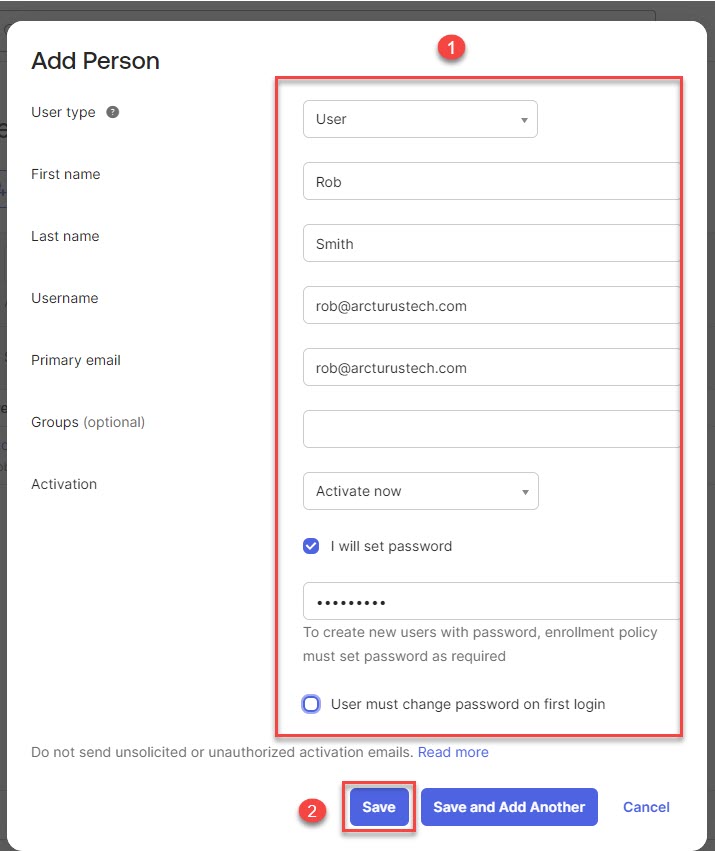
2. Enter the user details and set the password and click the Save button.
Group Creation
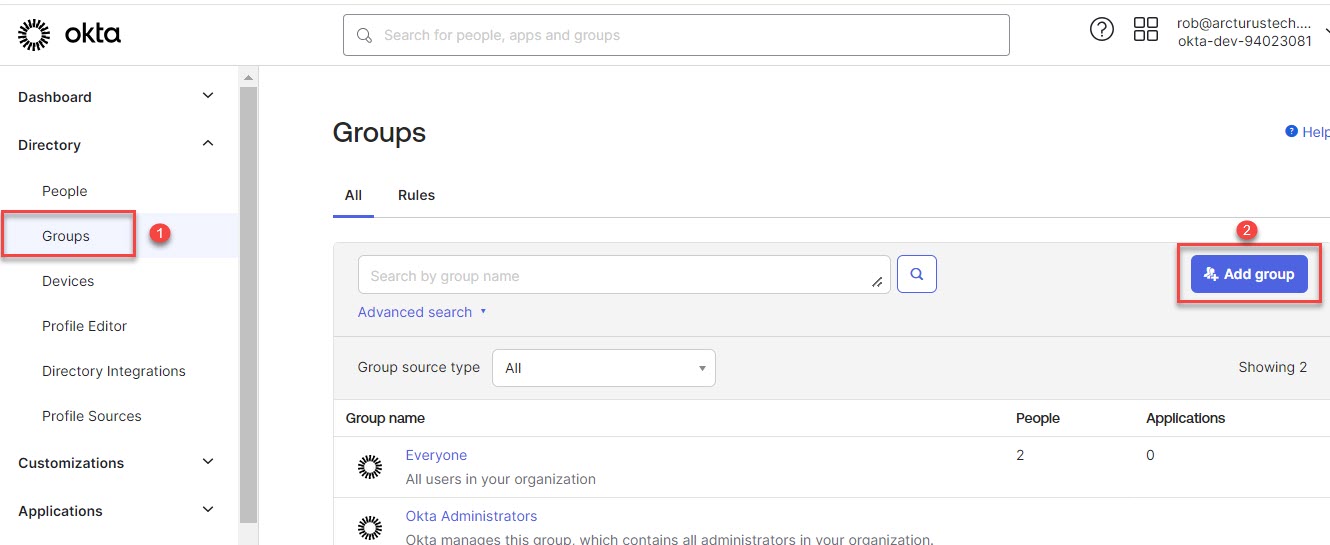
1. Go to Groups under the Directory menu and click the Add Group button.
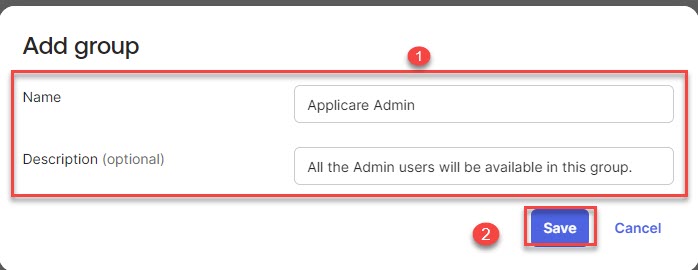
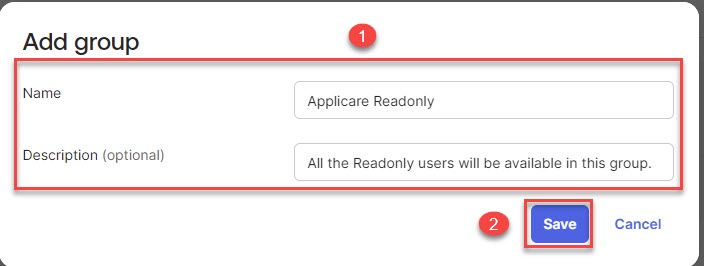
2. Enter Applicare Admin as the name and click the Save button. The description is optional.
3. Similarly, add another group with the name as Applicare Readonly and click the Save button. The description is optional.
App Integration
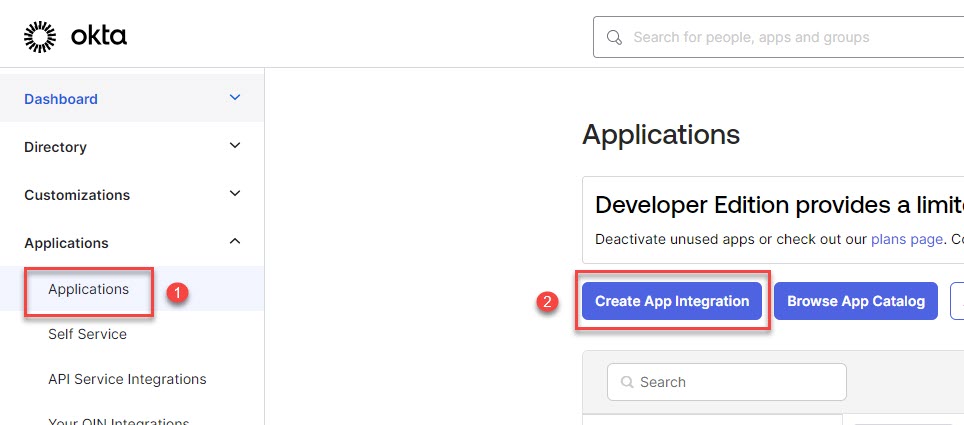
1. Go to Applications under the Applications menu and click the Create App Integration button
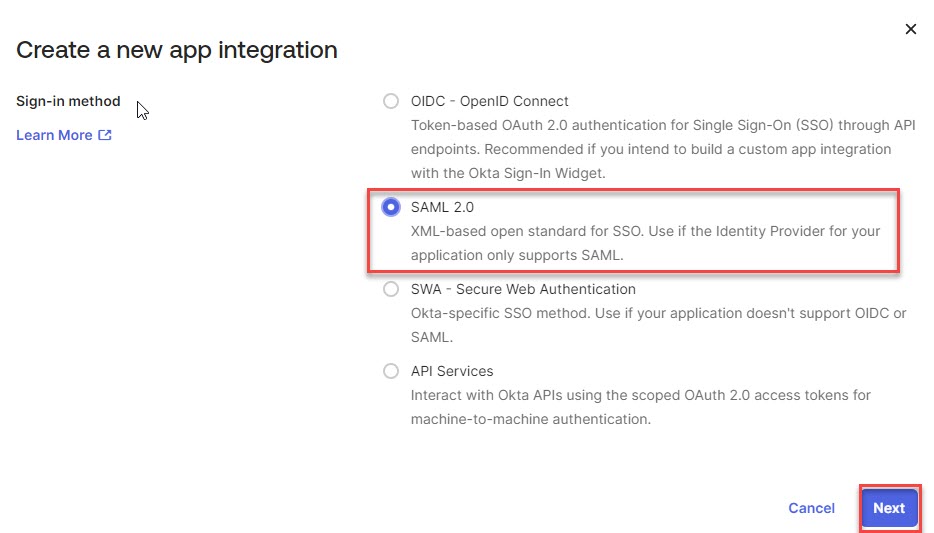
2. Select SAML 2.0 and click the Next button.
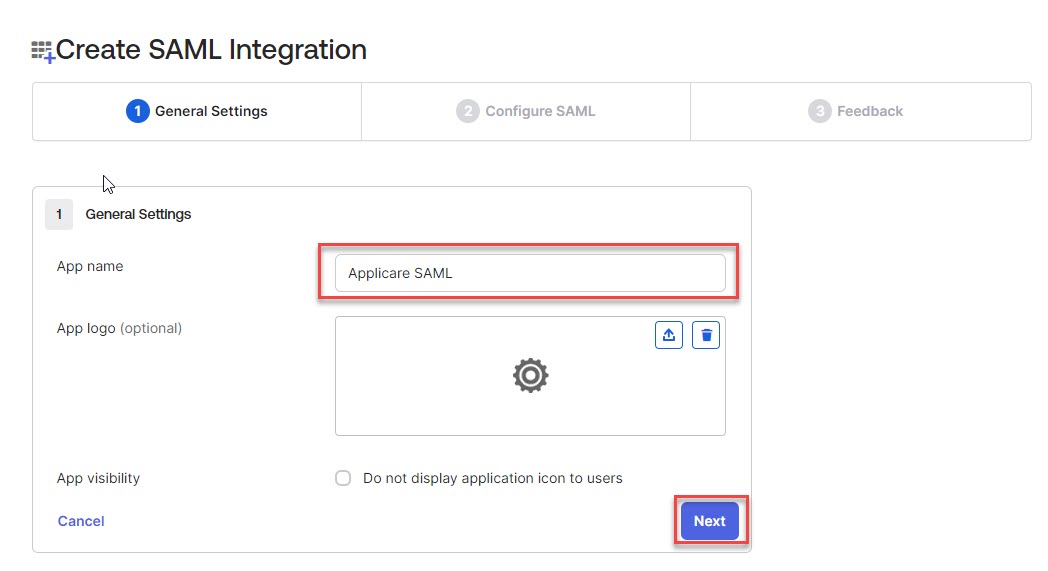
3. Enter the App name as Applicare SAML and click the Next button.
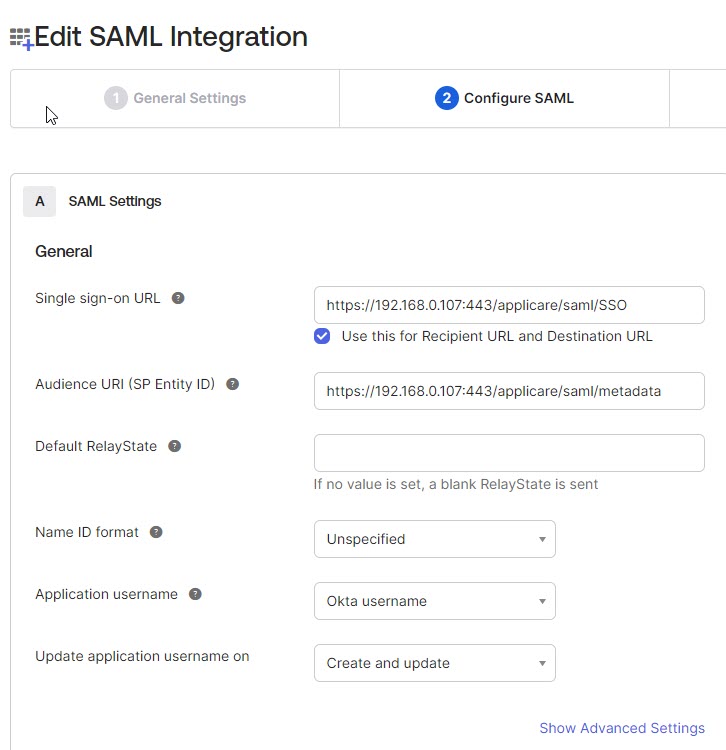
4. Enter the Single sign-on URL and Audience URI and select other options in the dropdown.
- Single sign-on URL -> Applicare_Base_URL/saml/SSO
- Audience URI (SP Entity ID) -> Applicare_Base_URL/saml/metadata
- Replace the Applicare_Base_URL with the actual URL.
e.g.
- Applicare_Base_URL->
https://192.168.0.107:443/applicare - Single sign-on URL ->
https://192.168.0.107:443/applicare/saml/SSO - Audience URI (SP Entity ID) ->
https://192.168.0.107:443/applicare/saml/metadata
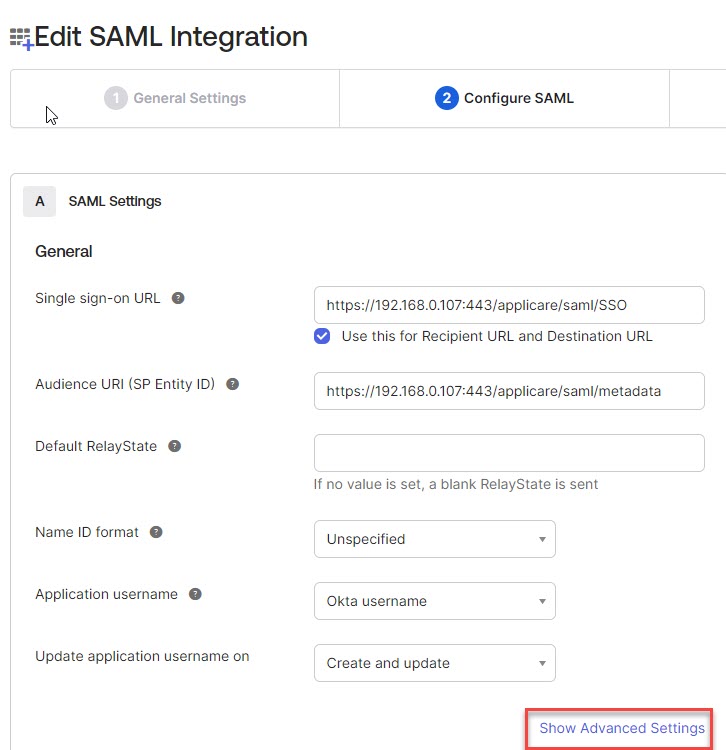
- Click Show Advanced Settings button
6. Add the below details
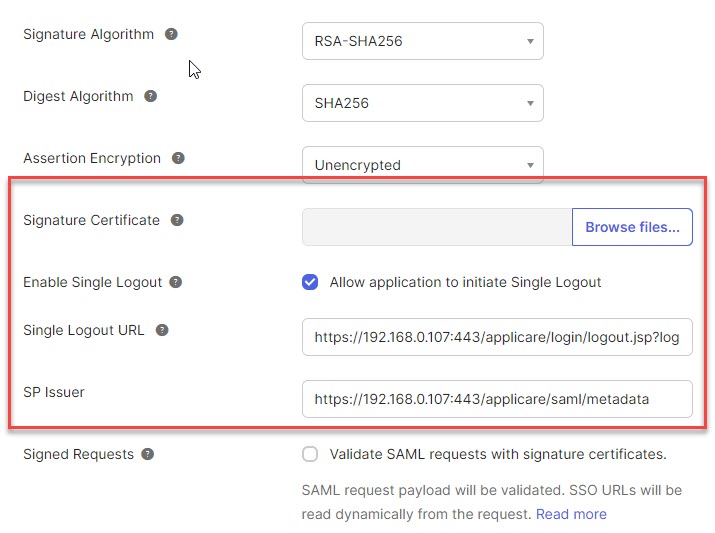
- Browse and upload the Applicare Signature Certificate file (.cer). This certificate file is generates during the HTTPS configuration for Applicare. For instruction on self- signed HTTPS configuration Click here.
- Check the box for Allow Application to initiate Single Logout.
- Enter the Single Logout URL as Applicare_Base_URL/login/logout.jsp?loginType=console
- Enter the SP Issuer as Applicare_Base_URL/saml/metadata
- Replace the Applicare_Base_URL with actual URL.
e.g.
- Applicare_Base_URL ->
https://192.168.0.107:443/applicare - Single Logout URL ->
https://192.168.0.107:443/applicare/login/logout.jsp?loginType=console - SP Issuer ->
https://192.168.0.107:443/applicare/saml/metadata
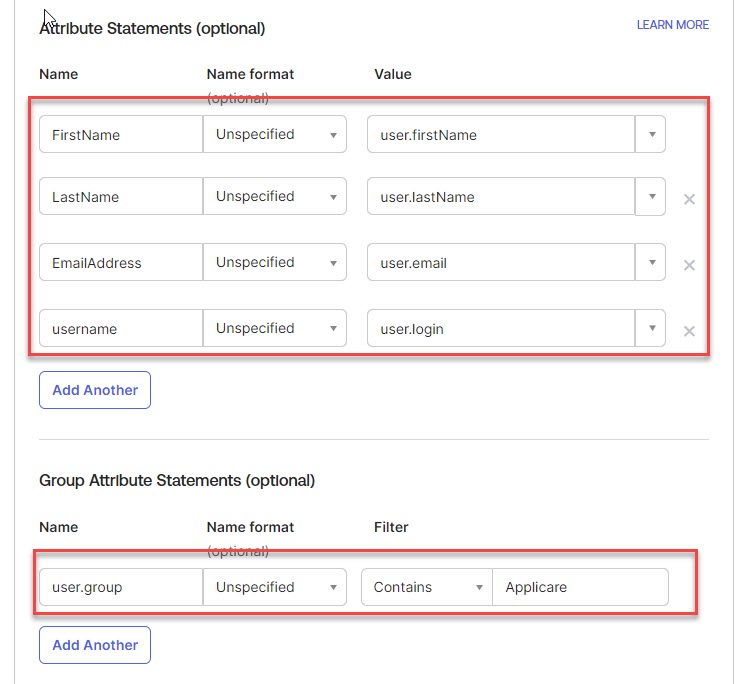
7. Add the FirstName, LastName, EmailAddress, Username and user.group attributes, then click the Next button.
8. Click the Finish button.
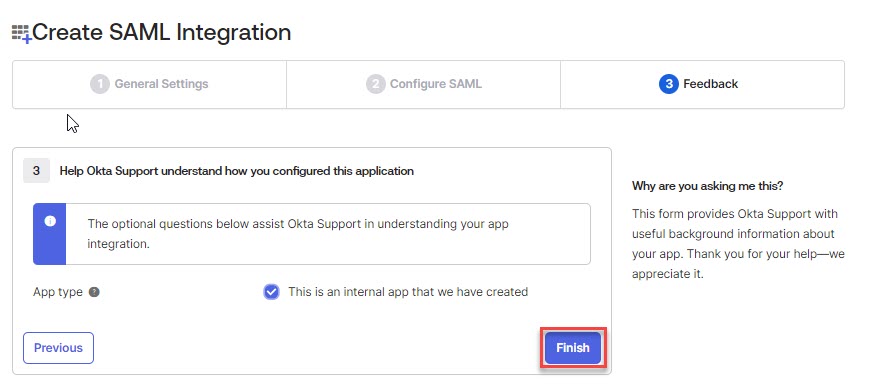
Assign Application to People
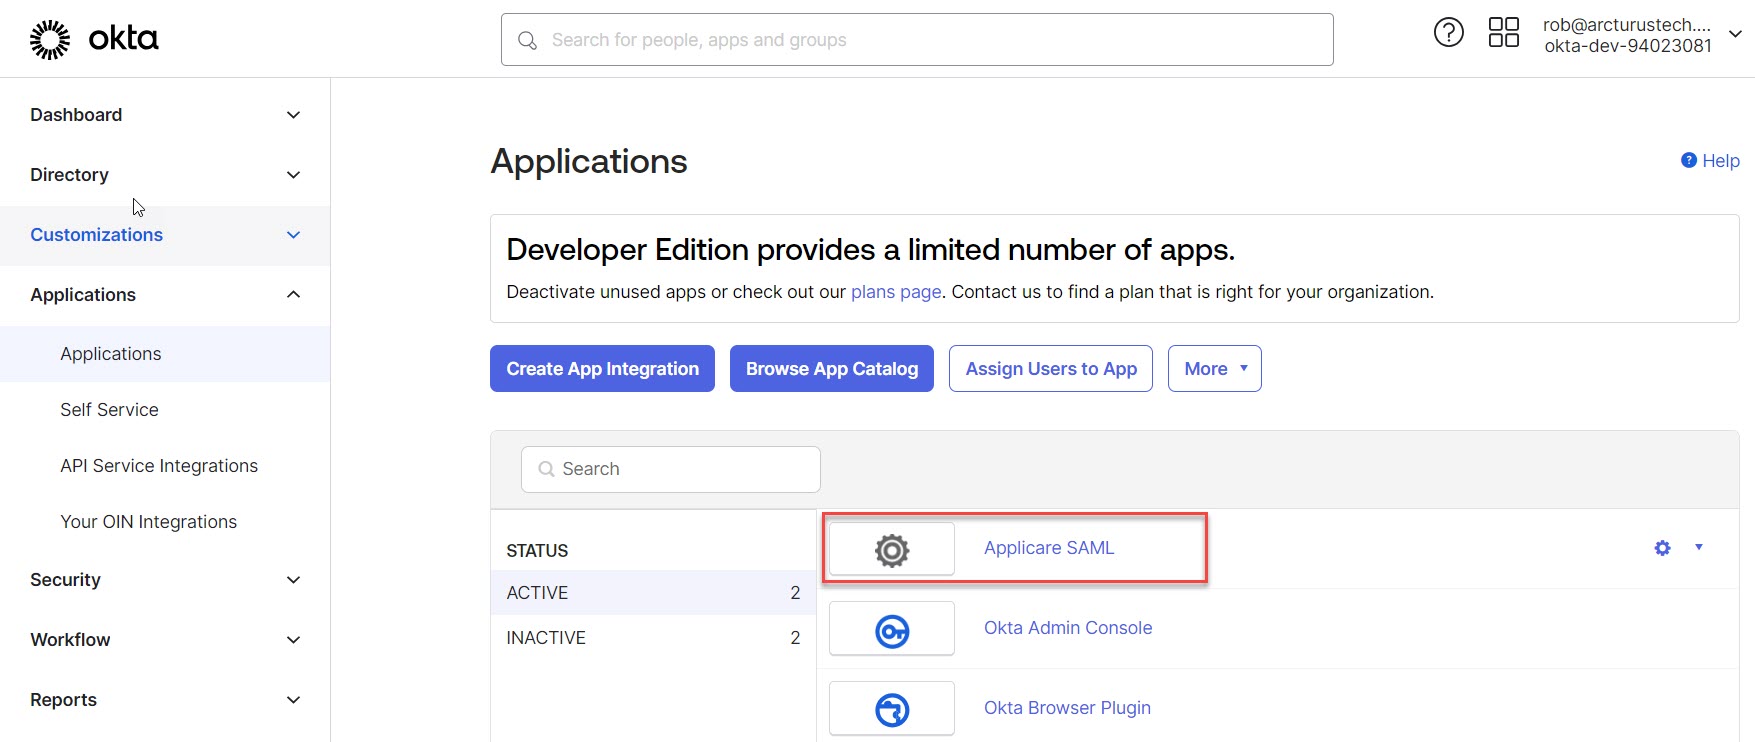
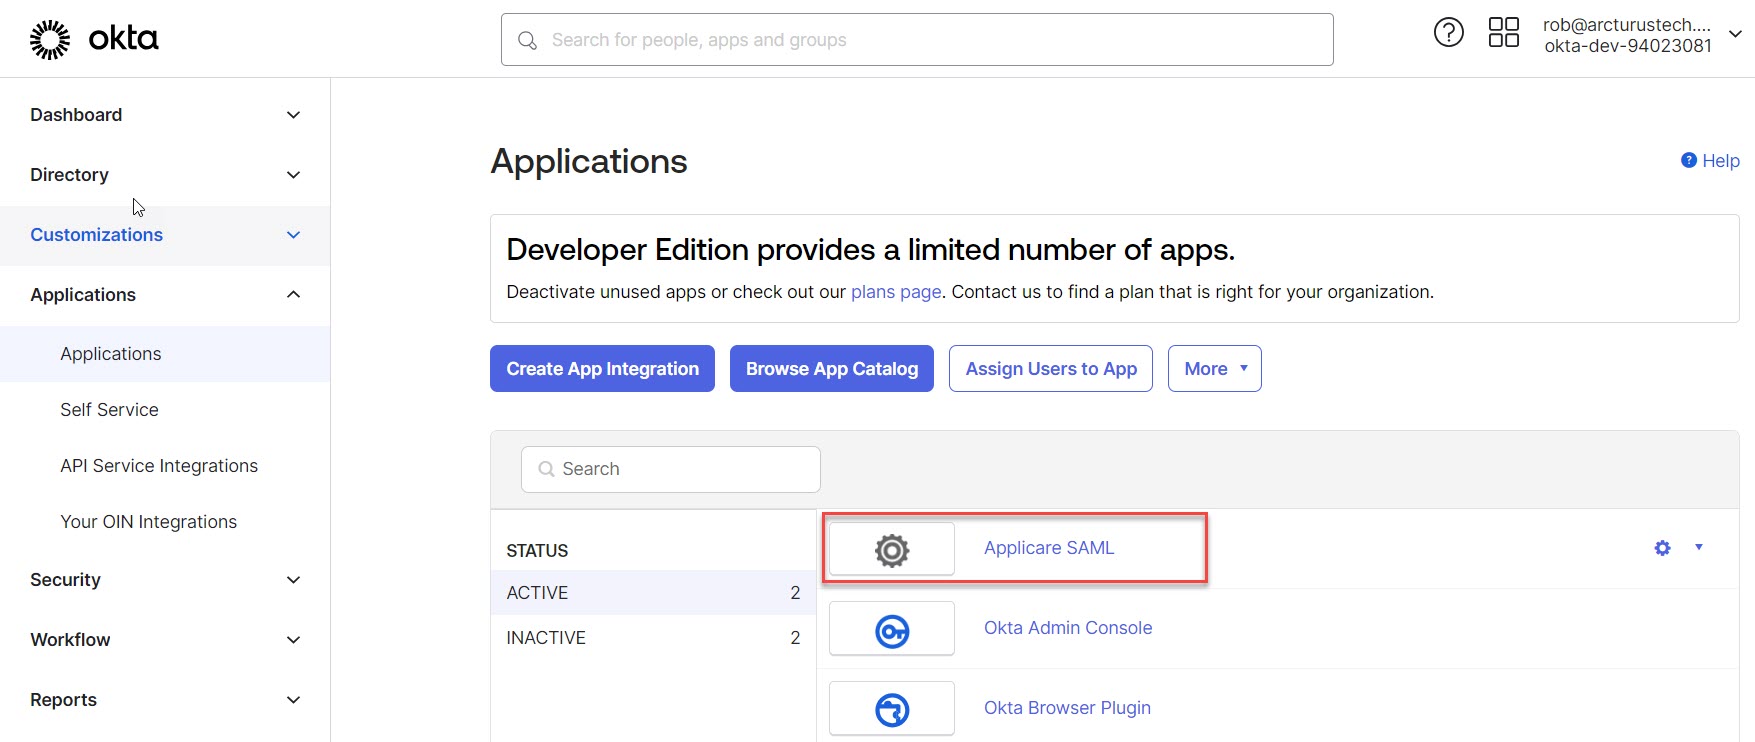
1. Go to Applications under the Applications menu and select Applicare SAML.
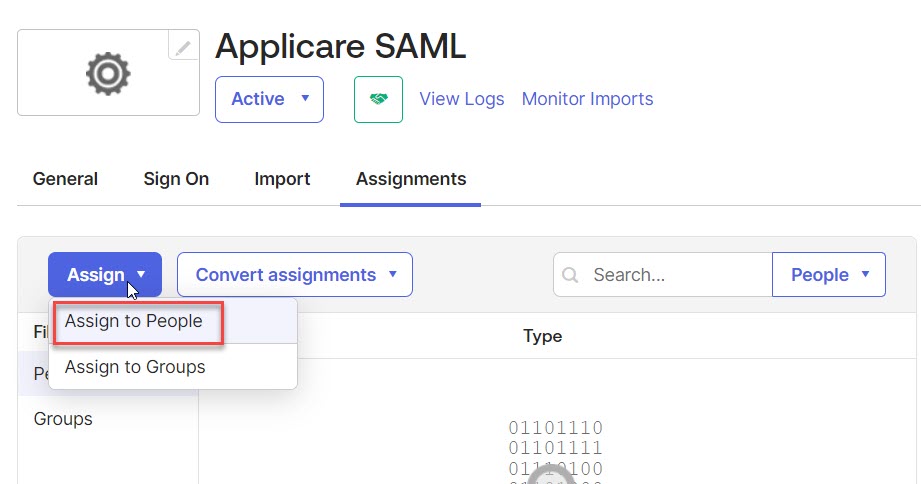
2. Select Assign to People option under the Assign dropdown.
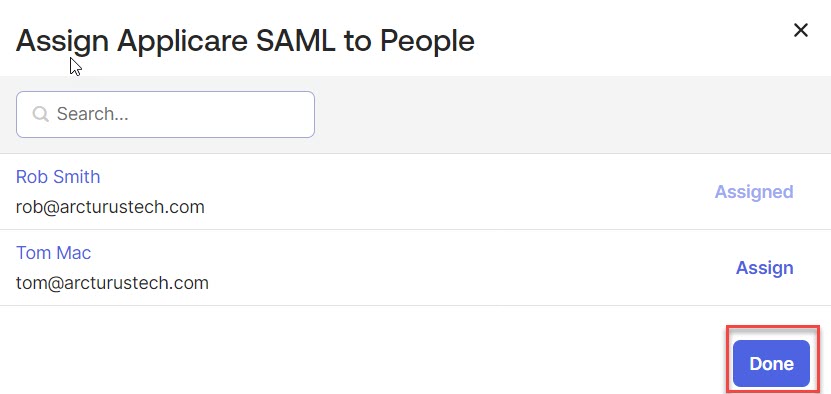
3. Click the Assign button for the user which we are going to assign the App.
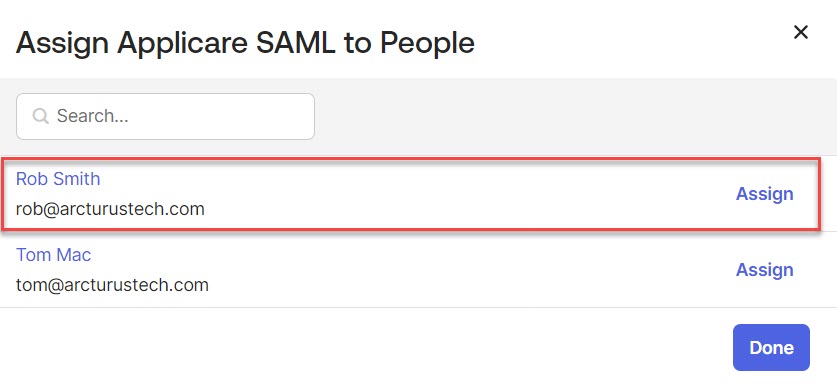
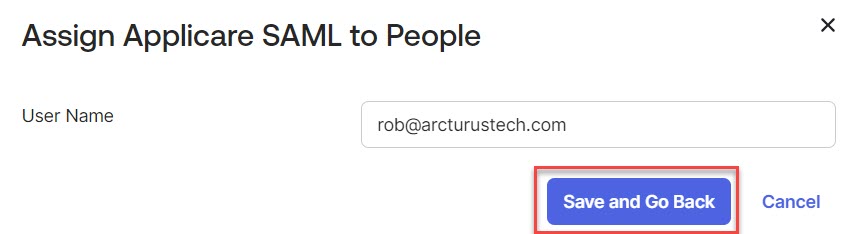
4. Click the Save and Go Back button.
5. After assigning the users click the Done button.
Assign Application to Group
Navigate to Applications under the Applications menu and select Applicare SAML.
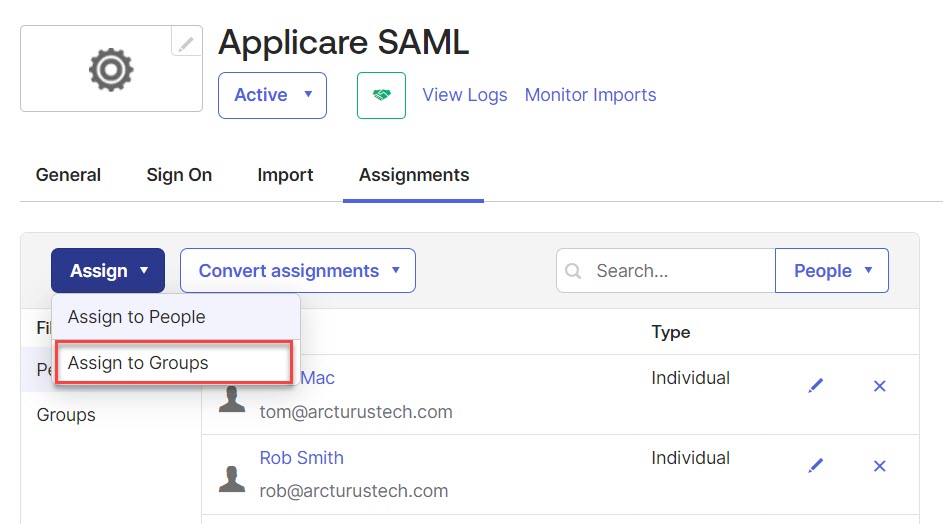
2. Choose Assign to Groups from the Assign dropdown.
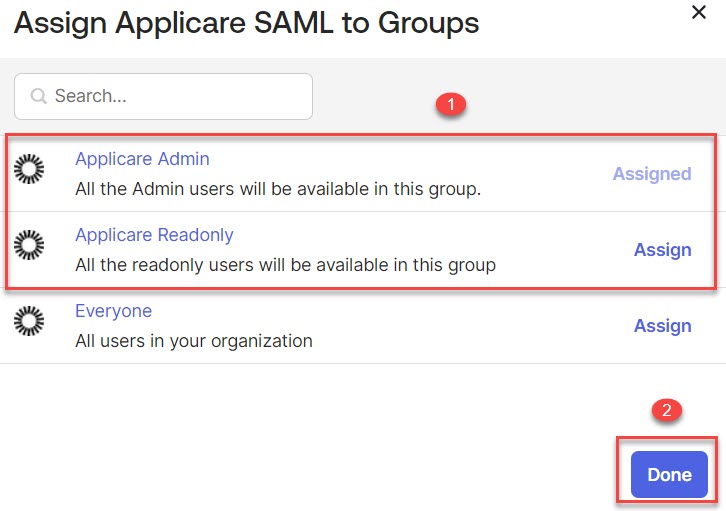
3. Click the Assign button for both the Applicare Admin and Applicare Readonly groups, then click the Done button.
Assign People to Group
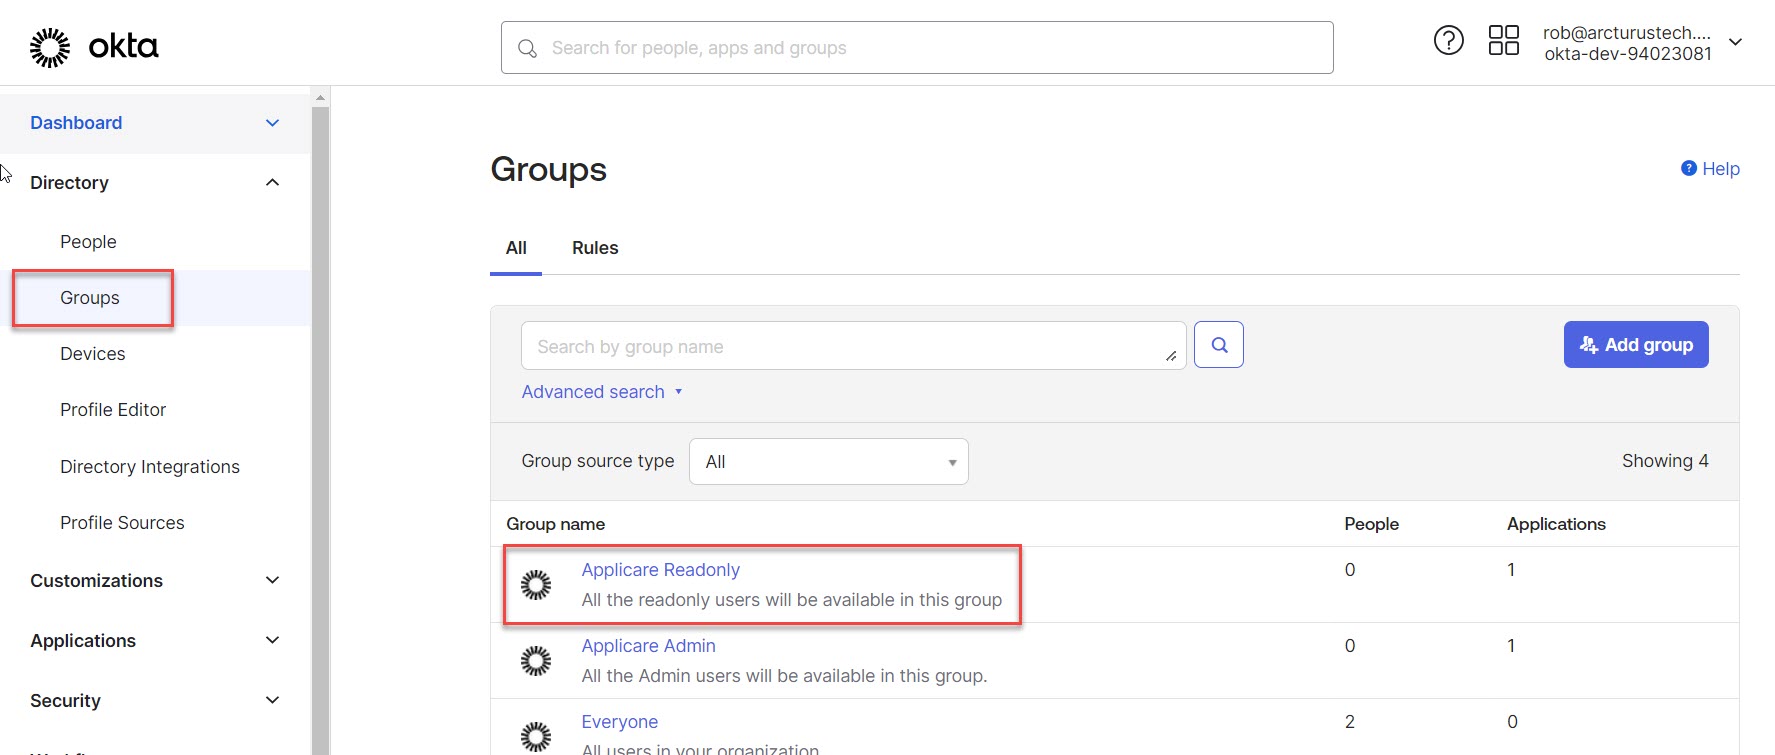
1. Go to Groups under the Directory menu and select the Applicare Readonly group.
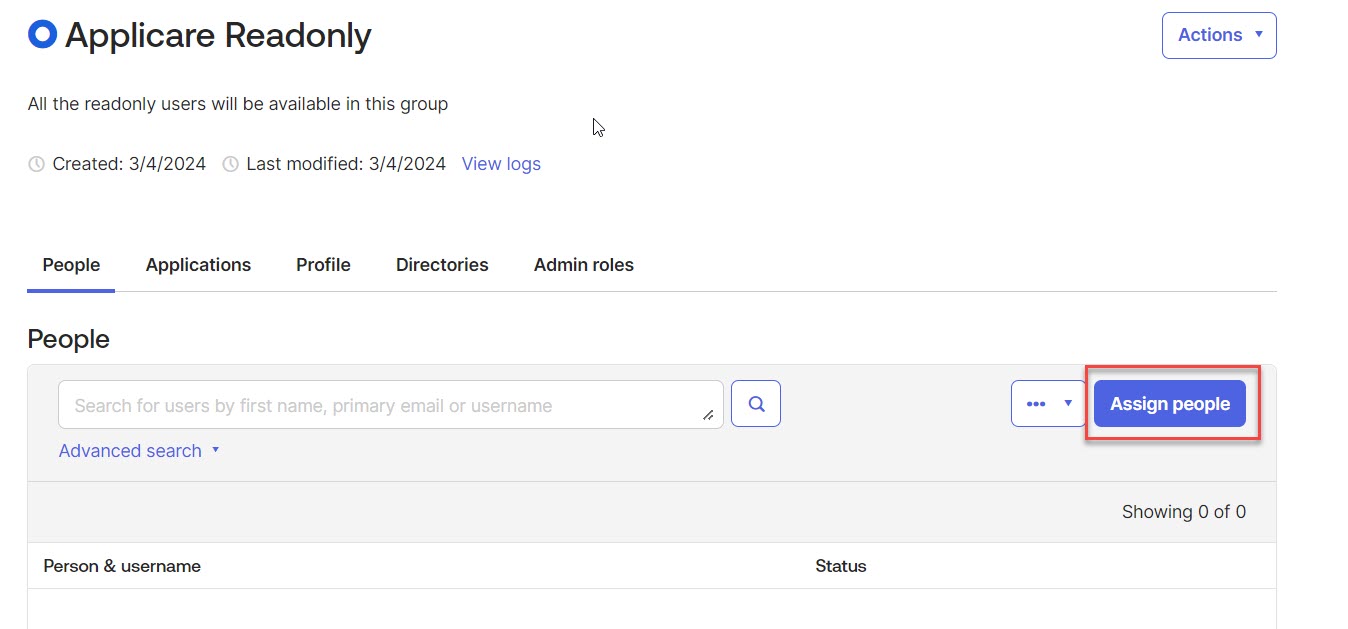
2. Click the Assign people button.
3. Click the plus button for the users which we need to assign that group.
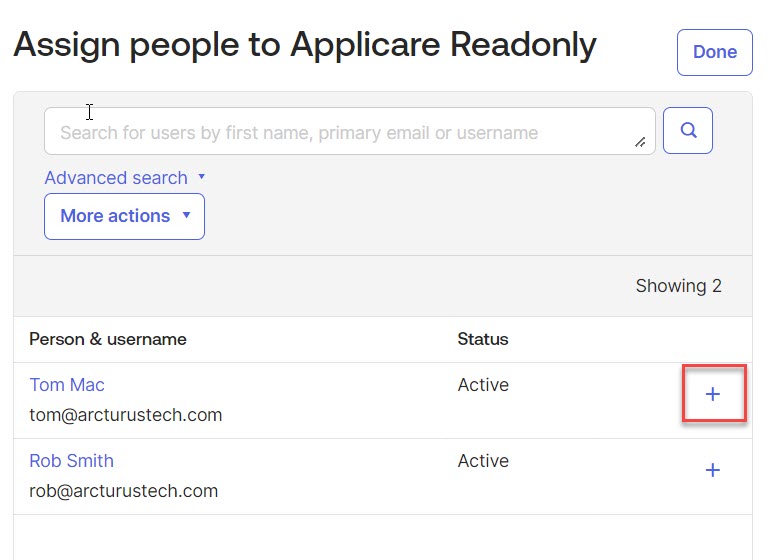
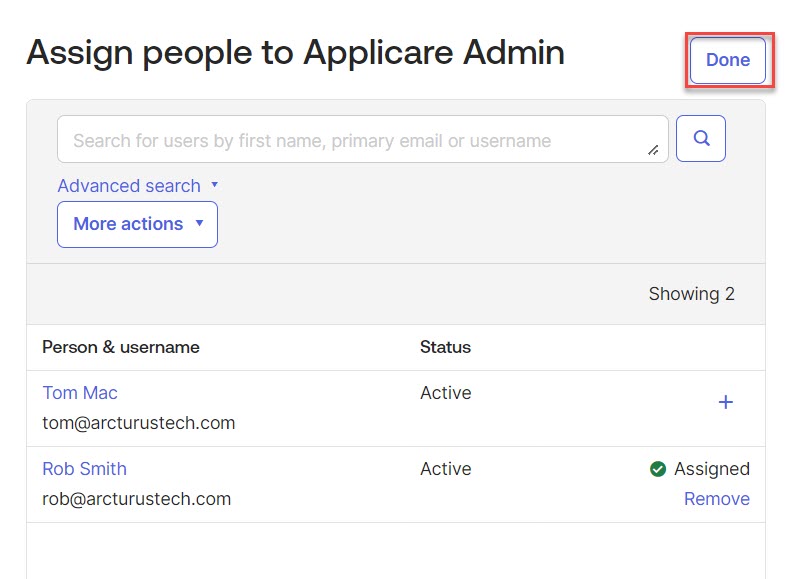
4. After assigning the users, click the Done button.
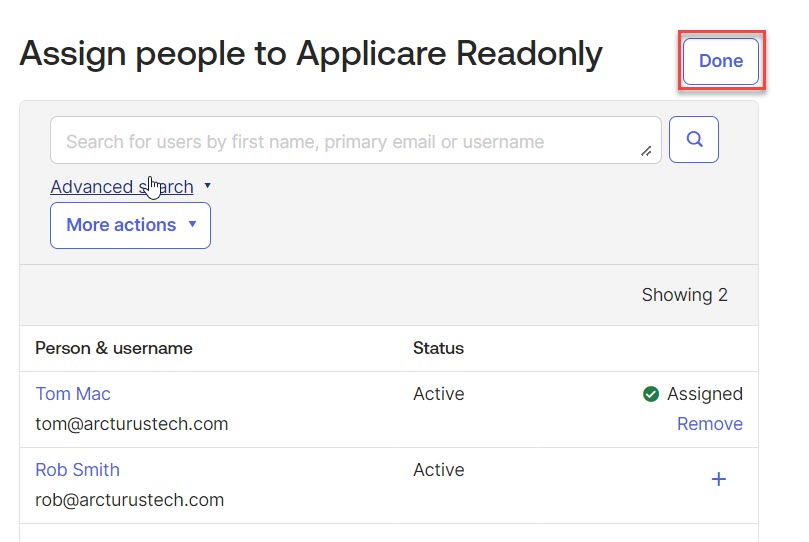
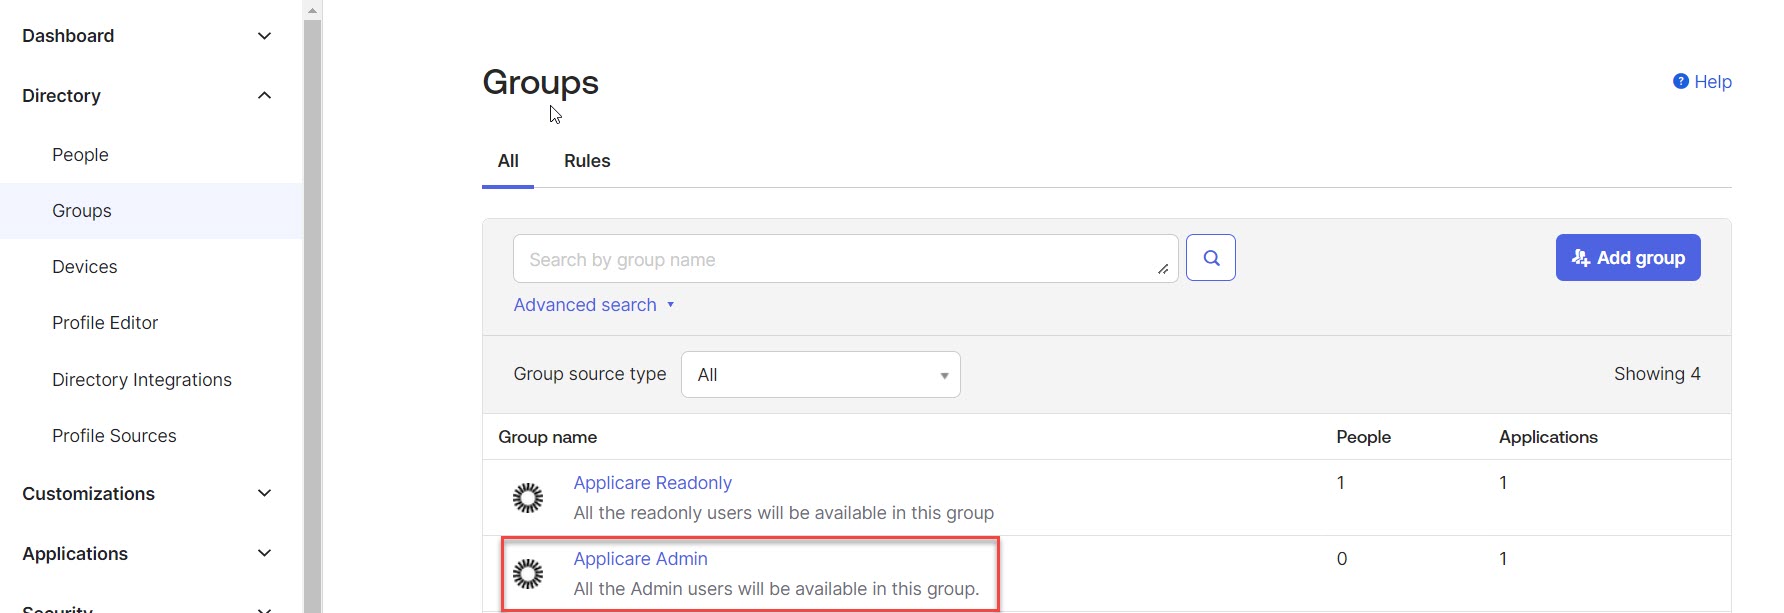
5. Go to Groups under the Directory menu and select the Applicare Admin Group.
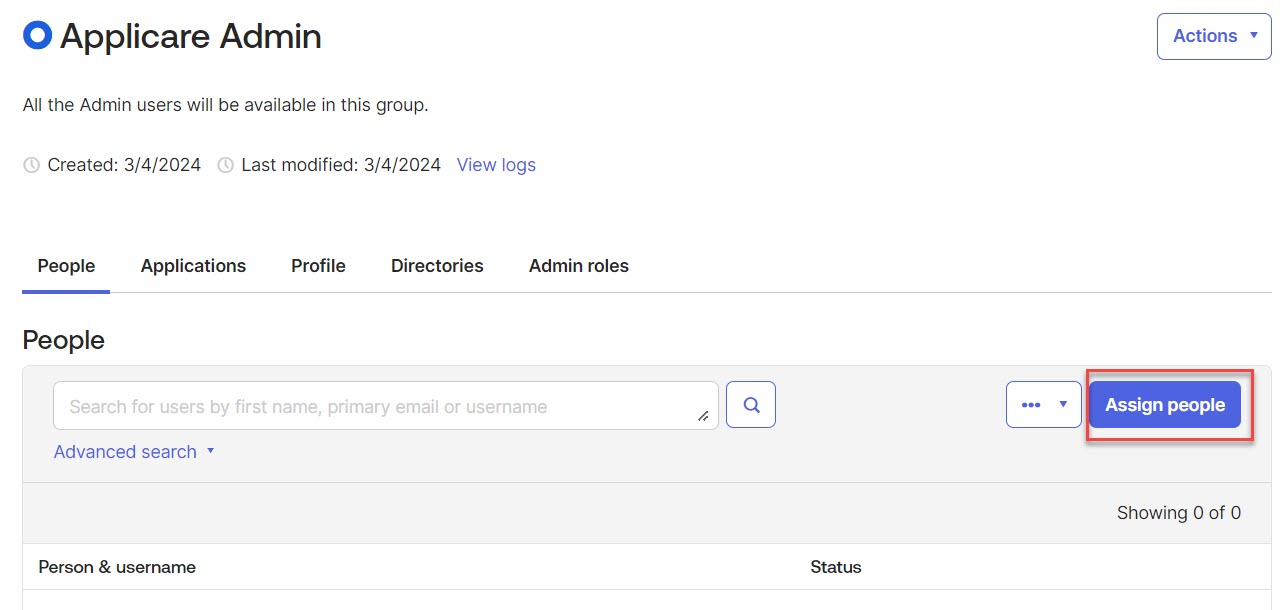
6. Click the Assign people button.
7. Click the plus button for the users which we need to assign that group.
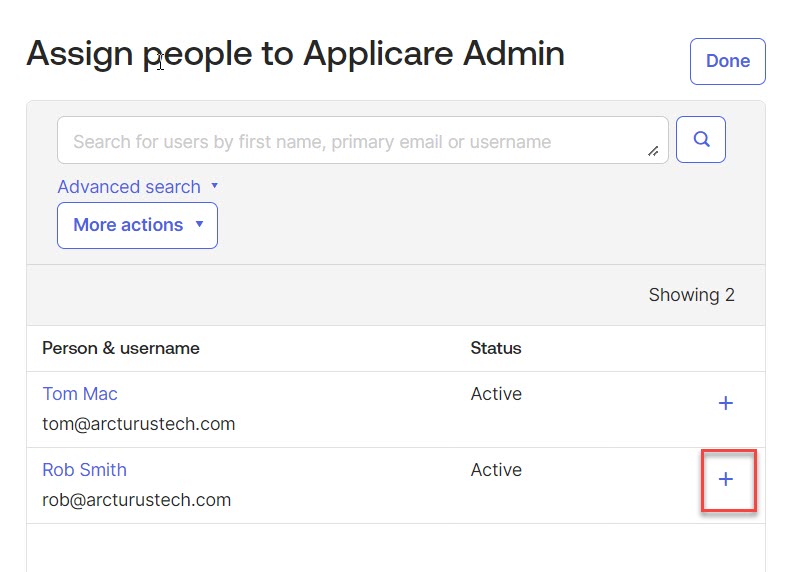
8. After assigning the users click the Done button.
Configuration on Applicare Controller
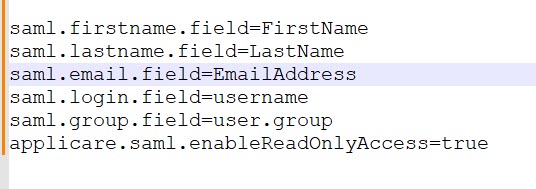
Step 1: Add the following properties to the ApplicareController.props file.
saml.firstname.field=FirstName saml.lastname.field=LastName saml.email.field=EmailAddress saml.login.field=username saml.group.field=user.group applicare.saml.enableReadOnlyAccess=true
The saml.login.field is used to authenticate the SAML user for the Application. If the username attribute is not available, use any other available provided by the Application.
e.g.
saml.login.field=EmailAddress (or) saml.login.field=FirstName (or) saml.login.field=LastName
Step 2: Modify the Applicare server startup script located in ${arcturus_home/scripts/setAdminEnv.sh} for Unix/Linux or ${arcturus_home/scripts/setAdminEnv.bat} for Windows.
1. Change the -Dspring.profiles.active=nosaml to -Dspring.profiles.active=saml option to JAVA_OPT as shown here:
-Dspring.profiles.active=samlThis is required for the Applicare server to start.

2. Configure Identity Provider Metadata XML
Obtain the URL from the Identity Provider.
To retrieve URL from OKTA:
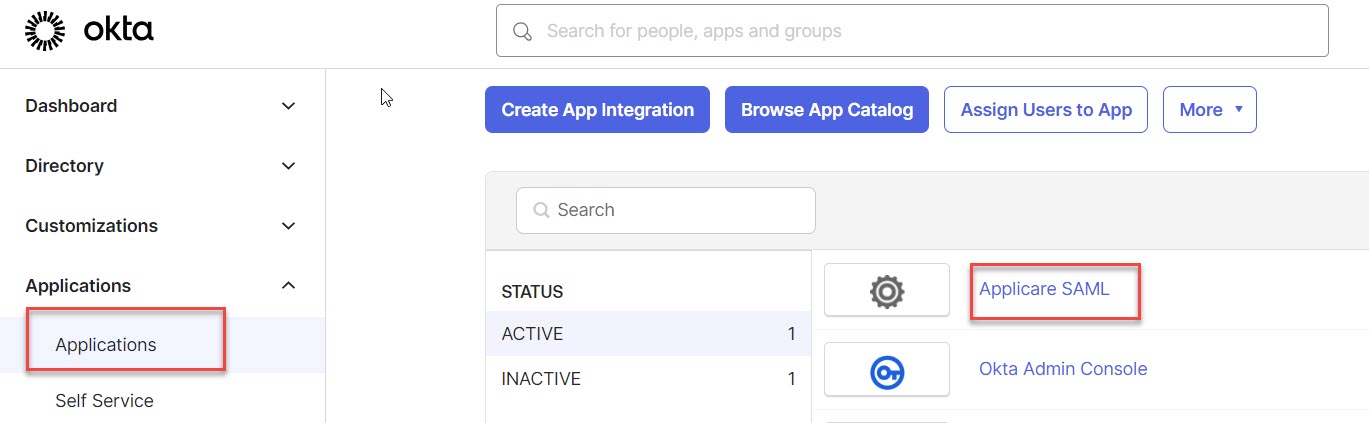
- Login in to OKTA.
- Select Applications from the left hand menu.
- Choose the Applicare SAML app.
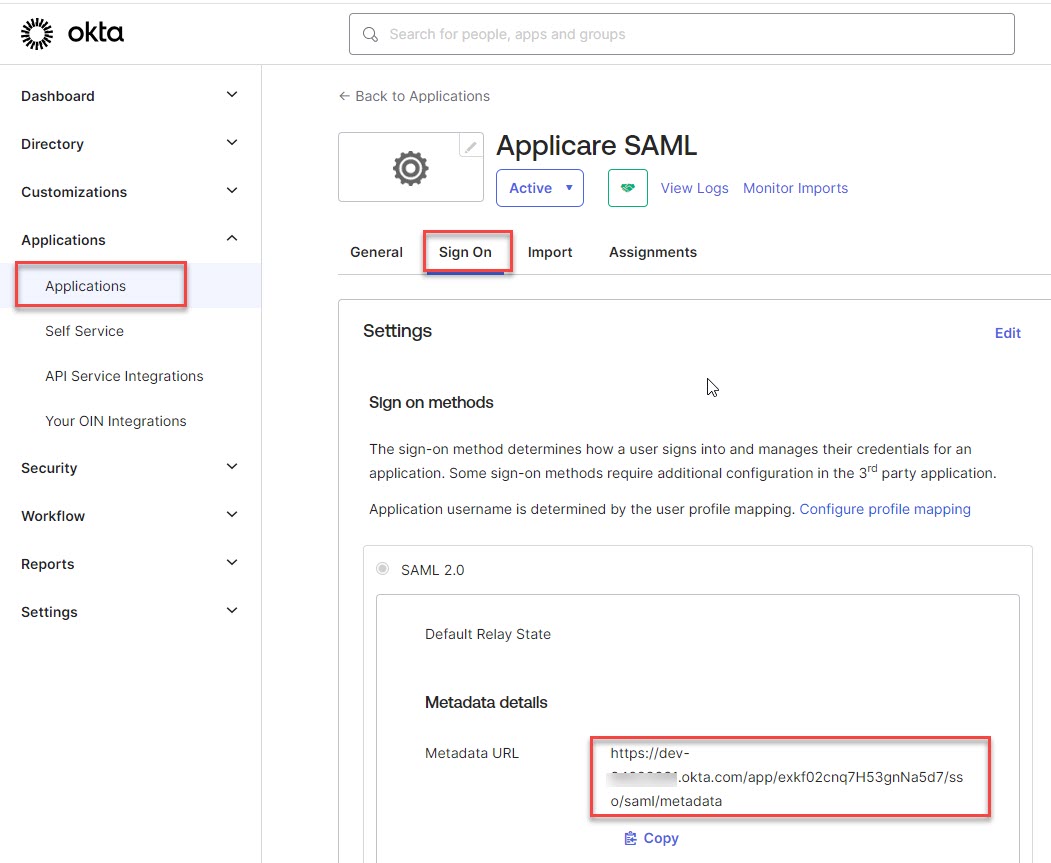
- Select the Sign On tab.
- Copy the Metadata URL and replace it in the <metadataurl> in the -Dsaml.idp.url argument.
-Dsaml.idp.url=<metadataurl>
Example:
-Dsaml.idp.url=https://dev-23232322.okta.com/app/exkf02cnq7H53gnNa5d7/sso/saml/metadata
3. Configure entity ID
-Dapplicare.saml.entityID=https://{ApplicareIP}:{ApplicarePort}/applicare/saml/metadata
Example:
-Dapplicare.saml.entityID=https://192.168.0.107:443/applicare/saml/metadata
4. Set the entity base
-Dapplicare.saml.entityBaseUrl=https://{ApplicareIP}:{ApplicarePort}/applicare
Example:
-Dapplicare.saml.entityBaseUrl=https://192.168.0.107:443/applicare
5. Set the Certificate file path
-Dsaml.jksfile=Applicare controller SSL Certificate (.jks) file path
Example:
-Dsaml.jksfile=C:\sscertificate\certificate.jks
6. Set the KeyStore alias name
-Dsaml.jksalias=ALIAS_NAME
Example:
-Dsaml.jksalias=applicare
7. Set the KeyStore password
-Dsaml.jkskeystorepass=Keystore password
Example:
-Dsaml.jkskeystorepass=changeit
8. Set the Key password
-Dsaml.jkskeypass=Key password for alias
Example:
-Dsaml.jkskeypass=changeit