
Follow the steps below to start Nginx using Task Scheduler.
Steps 1: Create a startn.bat file with the following content in the folder where Nginx is extracted.
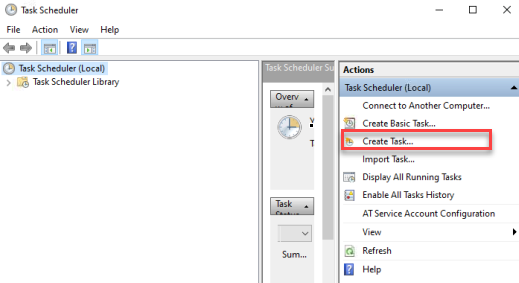
start nginx.exeSteps 2: Open Task Scheduler and click Create Task.
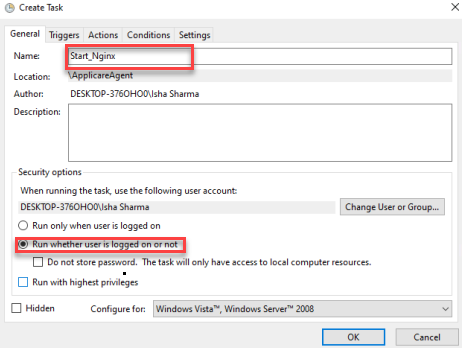
Steps 3: Enter a name for the task and select the Run whether the user is logged on or not.
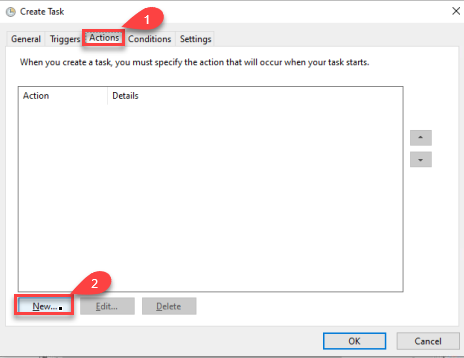
Steps 4: Go to the Action tab click the New button.
Steps 5: Click the Browse button to select the startn.bat file. Enter the values in the Add arguments and start in fields, then click OK.
Add arguments: startn.bat
start in: <Nginx_extracted_directory>
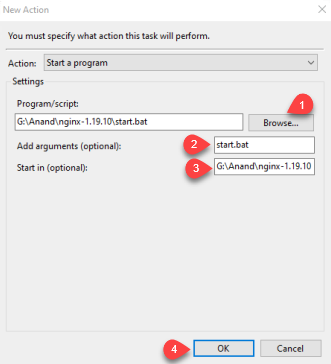
Steps 6: Finally, click OK, enter the user credential and save the task.
To stop Nginx, navigate to the directory where Nginx is extracted and execute the following command.
nginx -s stop