
Linux
1. Navigate to the Remote Deployment menu.
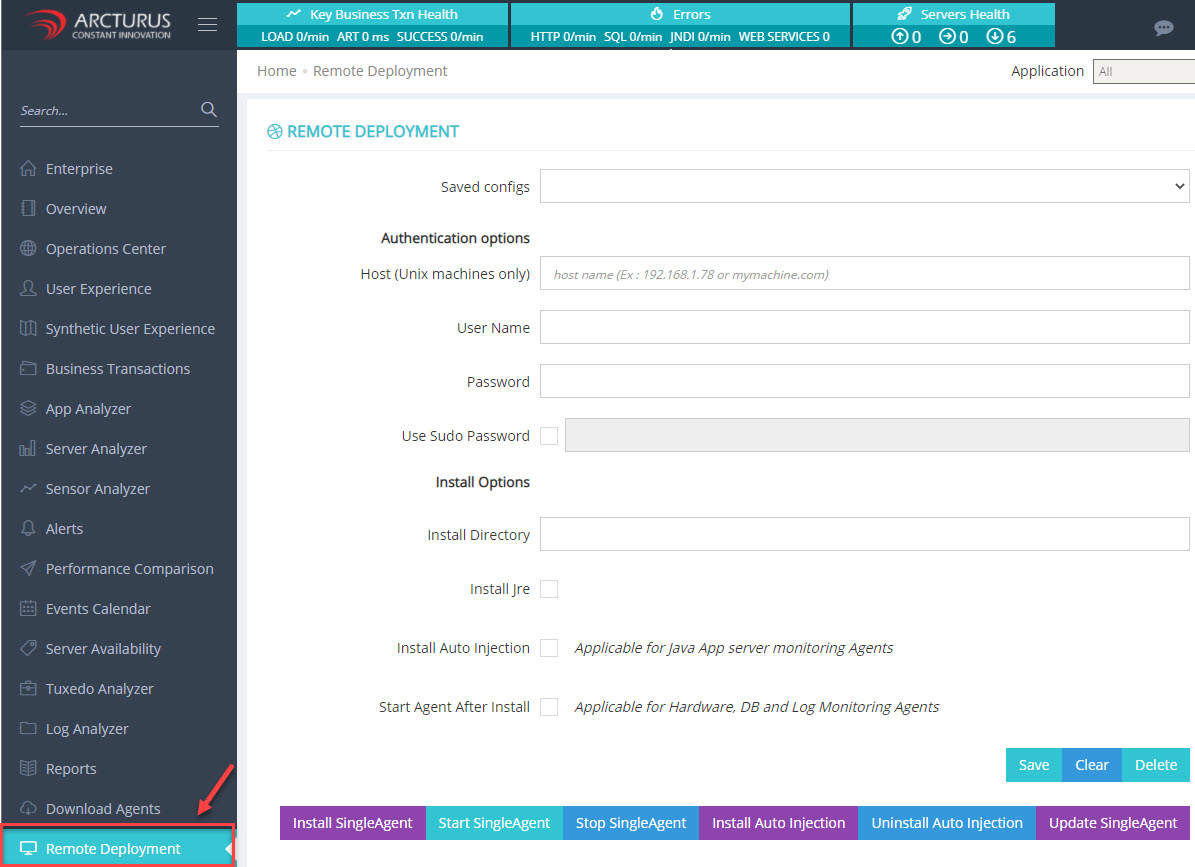
2. Provide the configuration details for the machine where the agent will be deployed:
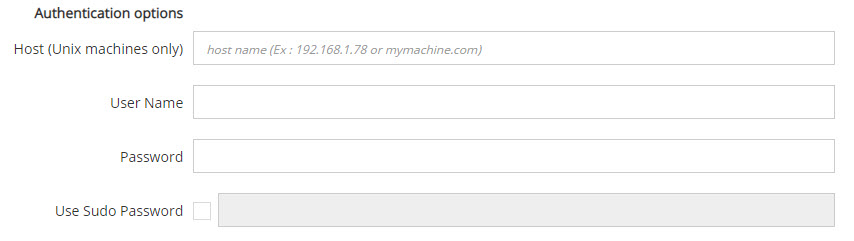
Host (Unix machines only) - Enter the hostname or IP address of the machine.
User Name - Provide the user name for login.
Password - Enter the login user password.
Use Sudo Password - Check this option if the login user requires elevated privileges through sudo to perform actions.
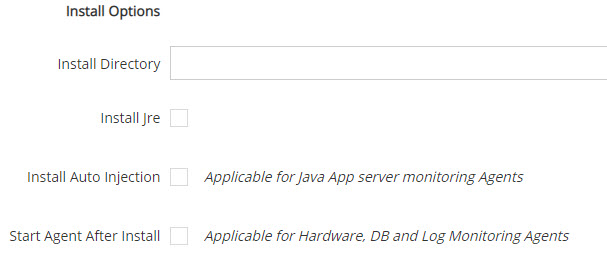
Install directory - Specify the location where the agent will be deployed.
Install JRE - Enable this option if the machine does not have the java installed. If this option is enabled agent will have its inbuilt JRE. Applicable for hardware, database and log monitoring agents.
Applicare Installer will have the JRE inbuilt by default in the location <ApplicareInstallerDirectory/jre/linux>. If we are going to use different JRE then zip the needed JRE folder and give a name to that new jre zip file and place it in the location <ApplicareInstallerDirectory/jre/linux>. So all the JRE's will be displayed in the JRE dropdown in the remote deployment screen. We can select the needed JRE and install the agent.
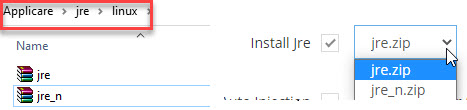
To zip custom JRE
Install the JRE based on the operating system and zip JRE directory.
Command to zip JRE directory
zip -r <zipname>.zip <zip_directory>e.g. To zip jre1.8 directory which is available in the path /dev/home zip -r jre18.zip /dev/home/jre1.8
Install Auto Injection - Select this option to install the Applicare wrapper on the configured machine, which will automatically inject the SingleAgent startup scripts while starting the java app servers. Enable this if you plan to monitor Java app server agents.
Start Agent After Install - It will start the SingleAgent immediately after installing the agent. Enable this option if we are going to monitor hardware, database and log monitoring agents.
Saved configs - This dropdown will have all the saved configuration details.

Button Functionalities
Save - It will save the machine configuration details.
Clear - It will clear the fields on the screen.
Delete - It will remove the previously saved configuration details.

Install SingleAgent - This will set up Install SingleAgent on the configured machine.

Update SingleAgent - This will update the SingleAgent on the configured machine.

Applicable to hardware, database, and log monitoring agents:
Start SingleAgent - It will Start SingleAgent on the configured machine.
Stop SingleAgent - It will Stop SingleAgent on the configured machine.

Applicable for Java app server agents
Install Auto Injection - It will install the wrapper on the configured machine to auto inject the SingleAgent startup scripts while starting the Java app servers.
Uninstall Auto Injection - It will uninstall the wrapper in the configured machine.
