We can start SingleAgent using either of the following methods:
Script Mode
- Navigate to the ApplicareSingleAgent installation directory and execute the startAgent.bat file
Task Scheduler Mode
- Open command prompt as an administrator mode, navigate to the ApplicareSingleAgent installation directory and run the createAgentTask.bat file.

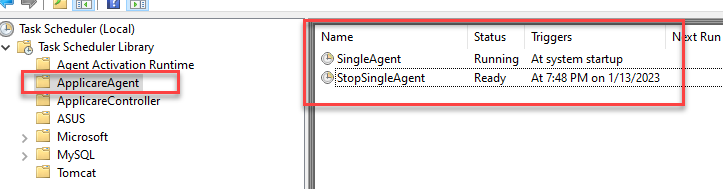
- SingleAgent will be set up as a scheduled task and will start automatically when the machine boots. To view the task, open Task Scheduler, expand the Task Scheduler Library, and select the ApplicareAgent folder. You will find two tasks listed there.
- SingleAgent - Use this task to start SingleAgent. By default, it will be running after the agent installation.
- StopSingleAgent - Execute this task to stop the SingleAgent.