Step 1: Create a file called custom_nginx.conf with the content below.
user nginx;
worker_processes auto;
pid /var/run/nginx.pid;

events {
     worker_connections 1024;
}

http {
    log_format main '$remote_addr - $remote_user $time_iso8601 [$request_time] "$request" '
                    '$status $body_bytes_sent || "$request_body" || "$http_referer" '
                    '"$http_user_agent" "$http_x_forwarded_for"';

   access_log /var/log/access.log main;
   access_log /dev/stdout main;

   include /etc/nginx/conf.d/*.conf;
}
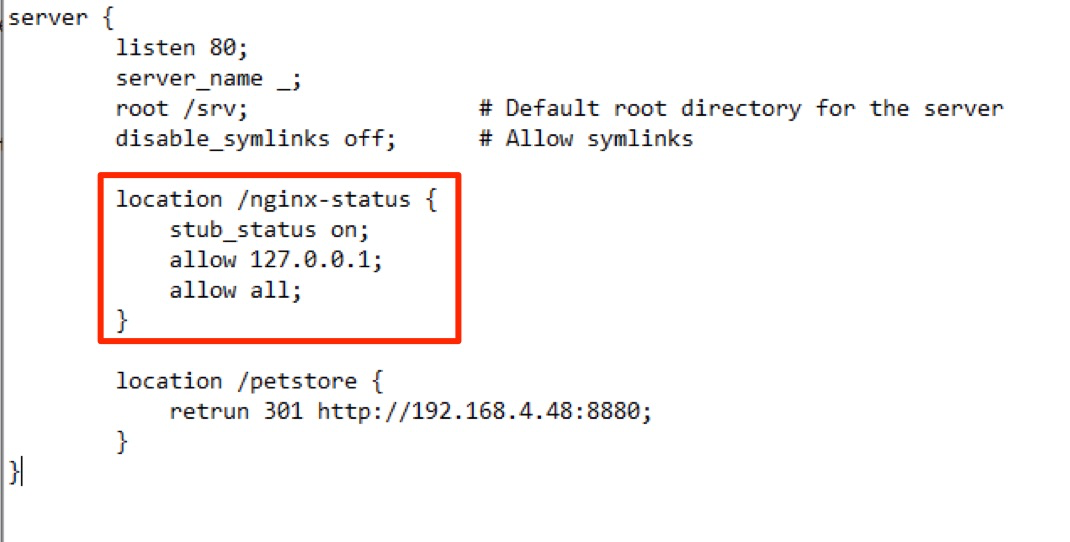
Step 2: Add the following location block to the server block in the nginx.conf or default.conf file you are already using, which is loaded as a Volume mount into the nginx container.
location /nginx-status {
stub_status on;
allow 127.0.0.1;
allow all;
}
Step 3: If an accesslog line exists in the nginx.conf or default.conf file, comment it out.
Step 4: Download the file agent_startup.sh from this link.
Note: While our agent can be directly downloaded into the nginx container, some containers may lack essential commands like curl or wget and unzip, In such cases, the agent must be downloaded manually and mounted as a volume in the container.
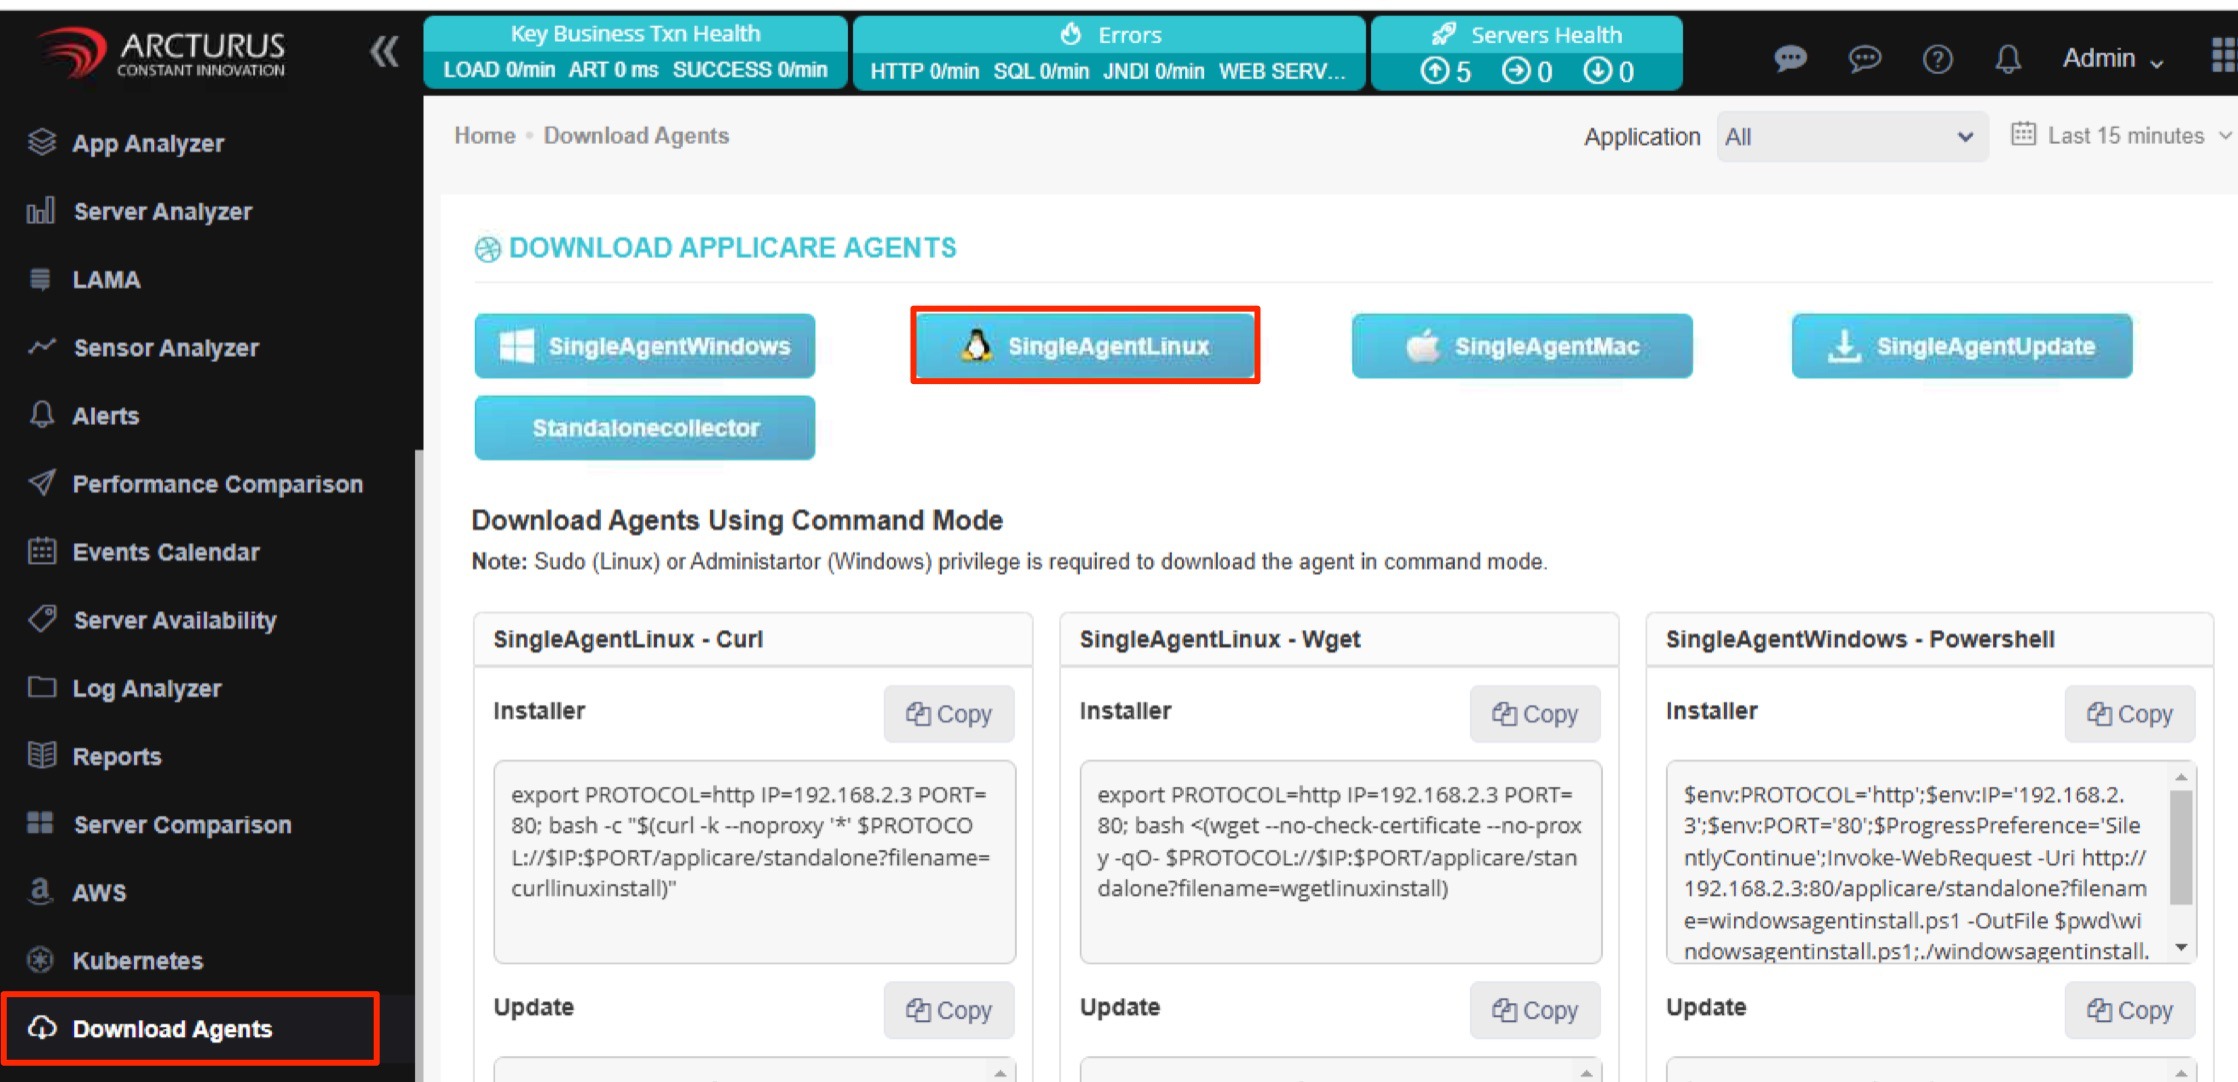
Step 5: Log in to Applicare console. Go to the Download Agent screen in the left-side menu, Download the SingleAgentLinux agent and extract it into the designated directory ApplicareSingleAgentLinux in host machine.
Step 6: In the 'agentscripts' directory within the extracted ApplicareSingleAgentLinux folder, locate and edit the 'startAgent.sh' file. Before the line containing 'JAVA_OPTS', insert the following line and save the changes.
JAVA_HOME_PATH=/usr/bin/java
export JAVA_HOME_PATH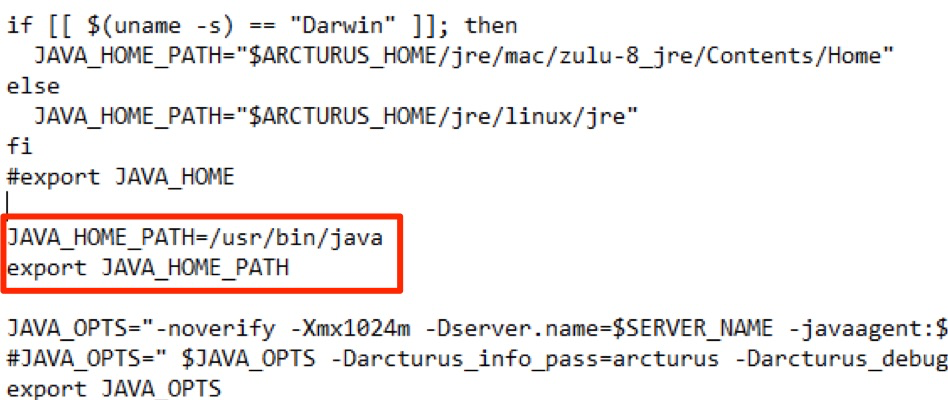
Step 7: Add the following command in your existing docker-compose.yml file.
hostname: The name which we need to add the agent in Applicare entrypoint: ["sh", "-c"]
command: > 'apk add --no-cache openjdk8-jre && chmod +x /usr/local/agent_startup.sh && /usr/local/agent_startup.sh && nginx -g "daemon off;"'
Add the following line to the Volume mount line in that yml file.
- where the agent_startup.sh file is located/agent_deploy.sh:/usr/local/agent_startup.sh - where the agent directory is located/ApplicareSingleAgentLinux:/usr/local/ApplicareSingleAgentLinux - where the custom_nginx.conf file is located/custom_nginx.conf:/etc/nginx/nginx.conf
Example:
version: '3.8'

services:
nginx:
image: nginx:1.23-alpine
container_name: nginx-server
restart: always

hostname: nginx_agent
entrypoint: ["sh", "-c"]
command: >
      'apk add --no-cache openjdk8-jre &&
      chmod +x /usr/local/agent_startup.sh &&
      /usr/local/agent_startup.sh &&
      nginx -g "daemon off;"'

ports:
- "85:80"
- "443:443"

volumes:
- /usr/local/agent_startup.sh:/usr/local/agent_startup.sh
- /usr/local/ApplicareSingleAgentLinux:/usr/local/ApplicareSingleAgentLinux
- /usr/local/custom_nginx.conf:/etc/nginx/nginx.conf
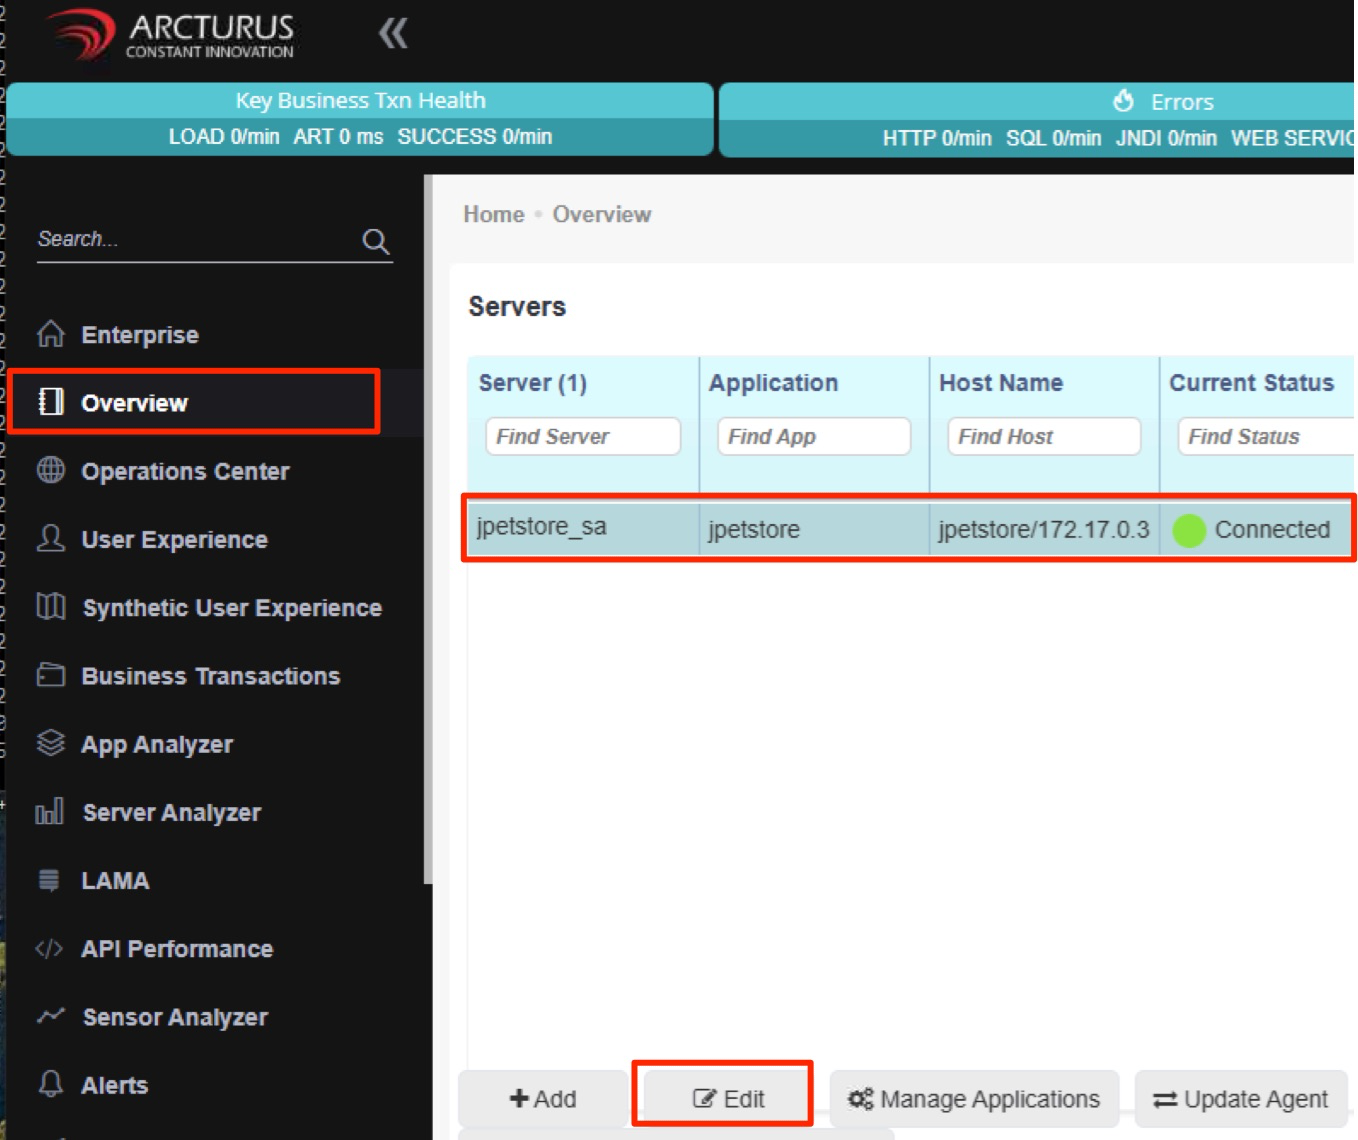
Step 8: After the container starts, the agent is automatically added with the Applicare controller. To manage it, log in to the Applicare console and go to the Overview menu. Find the newly added agent, select it, and click Edit to configure as needed.
Note: If the sub_status module is available, continue with Step 9. Otherwise, skip Step 9 and move directly to Step 10.
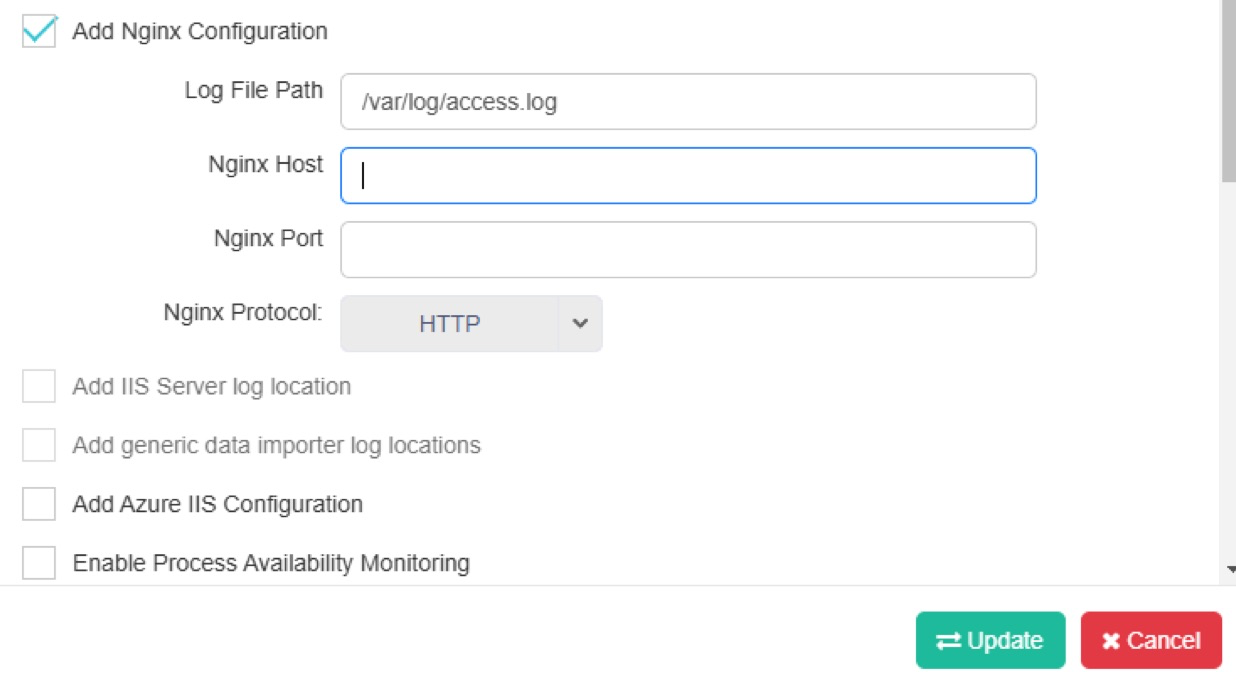
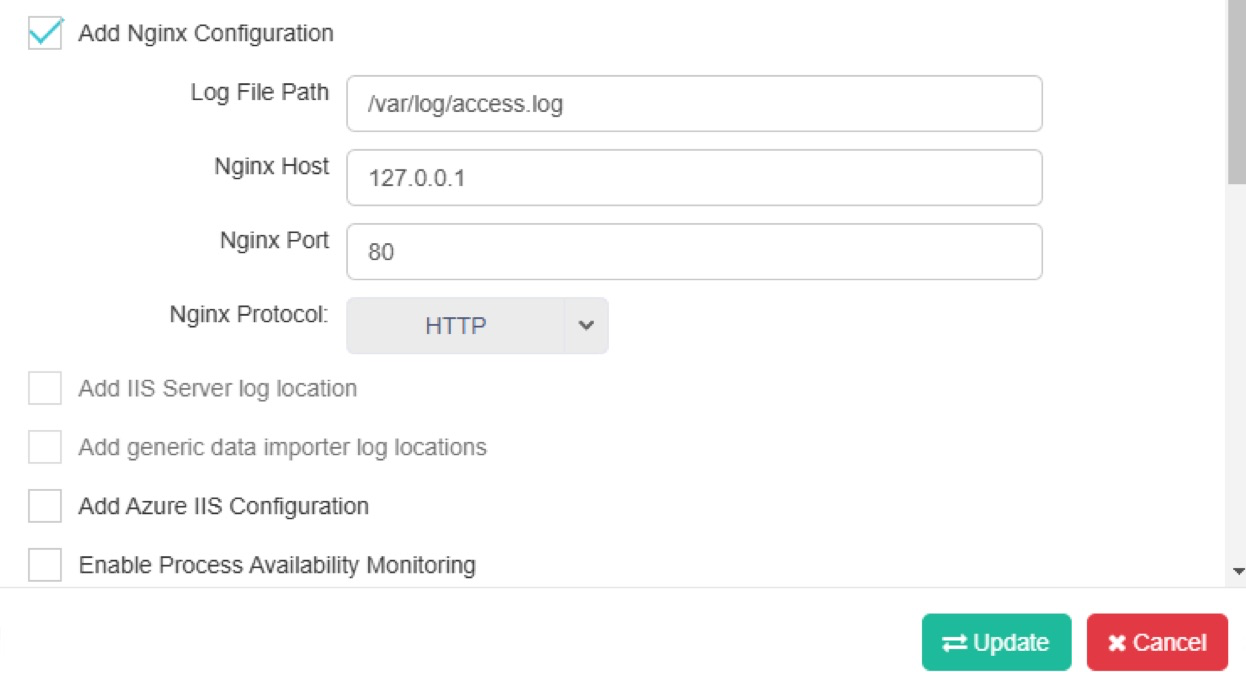
Step 9: Enable the "Add Nginx Configuration" checkbox and add the below values.
1. Log file path
2. Nginx Host
3. Nginx Port
4. Nginx Protocol
- Click the update button to save.
Step 10: Select the "Add Nginx Configuration" checkbox and add the below values.
1. Log file path
- Click the update button to save.