
1. Navigate to the Overview menu.
2. Choose the server from the grid and then click the Configure Dynamic Instrumentation button.
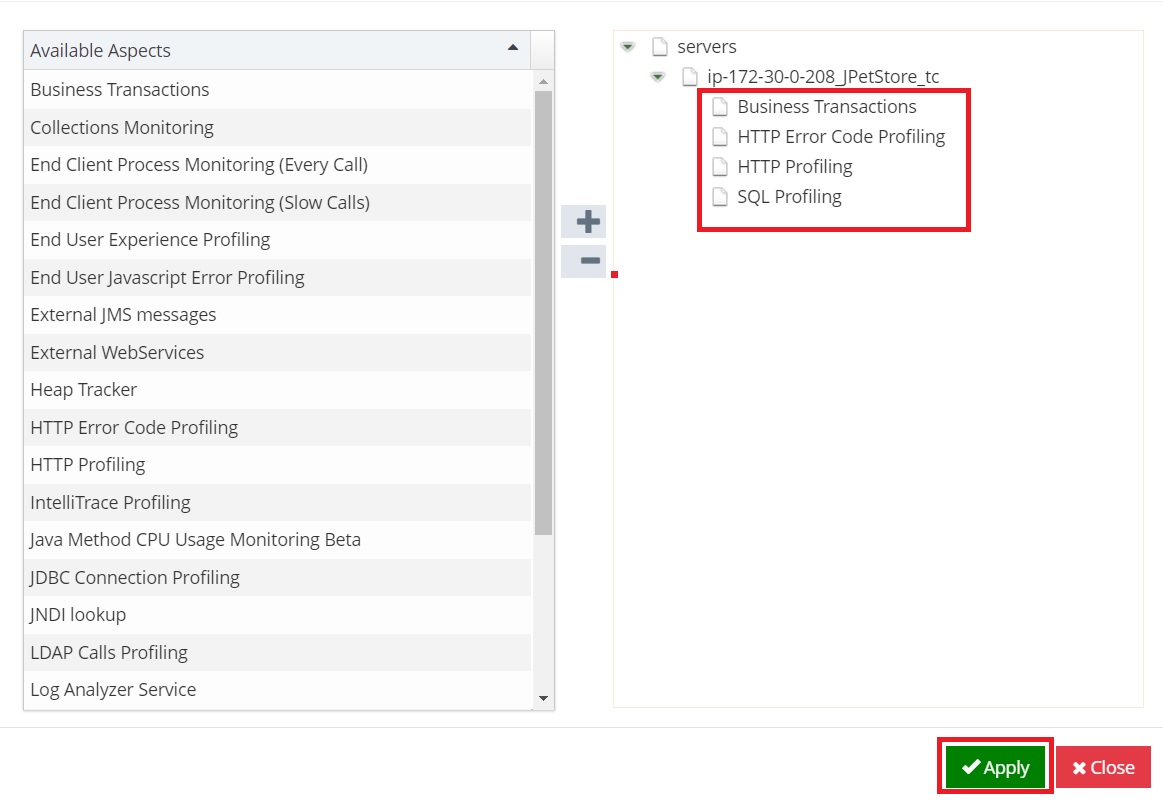
3. On the right hand-side, select only the Business Transactions, HTTP Error Code Profiling, HTTP Profiling and SQL Profiling aspects and then click the Apply button.
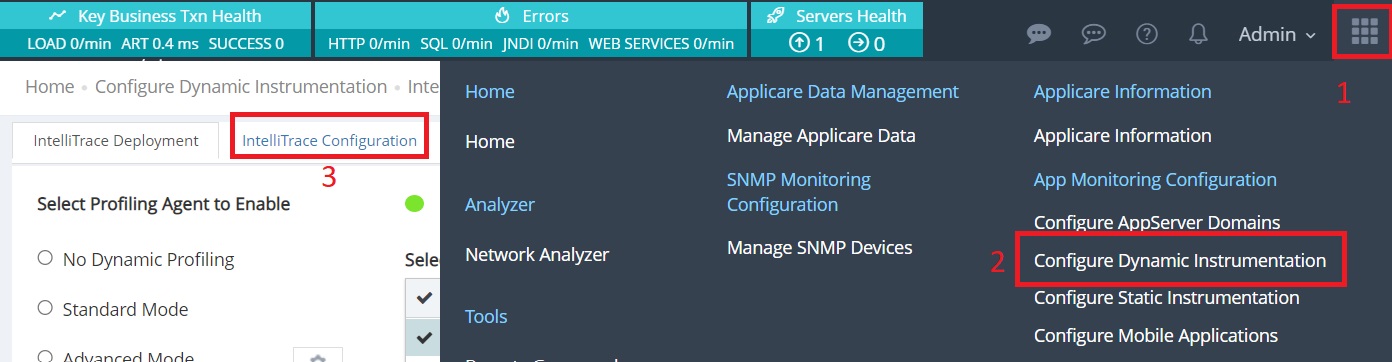
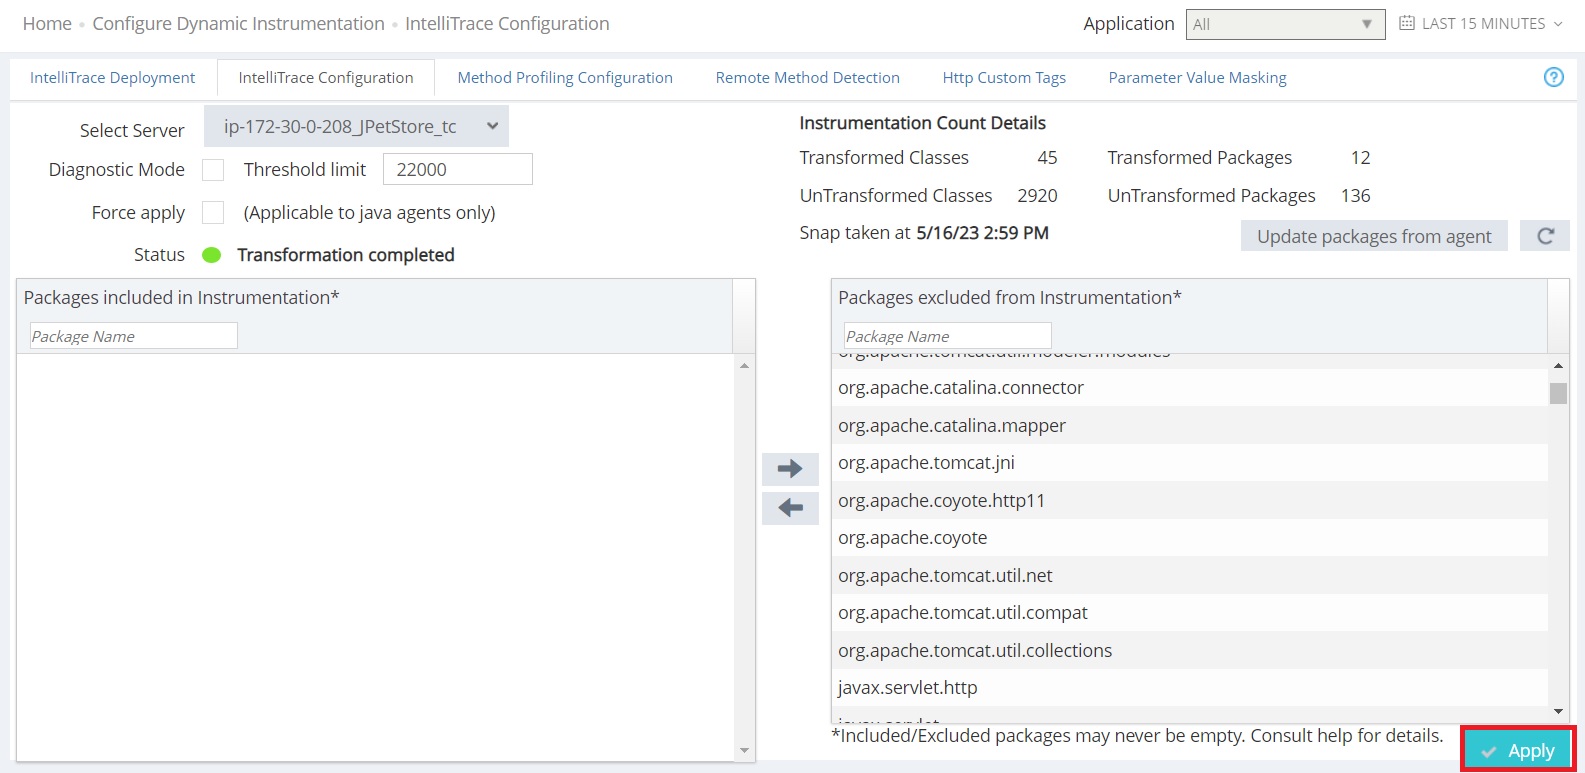
4. In the right-hand side menu, go to Configure Dynamic Instrumentation and select the IntelliTrace Configuration tab.
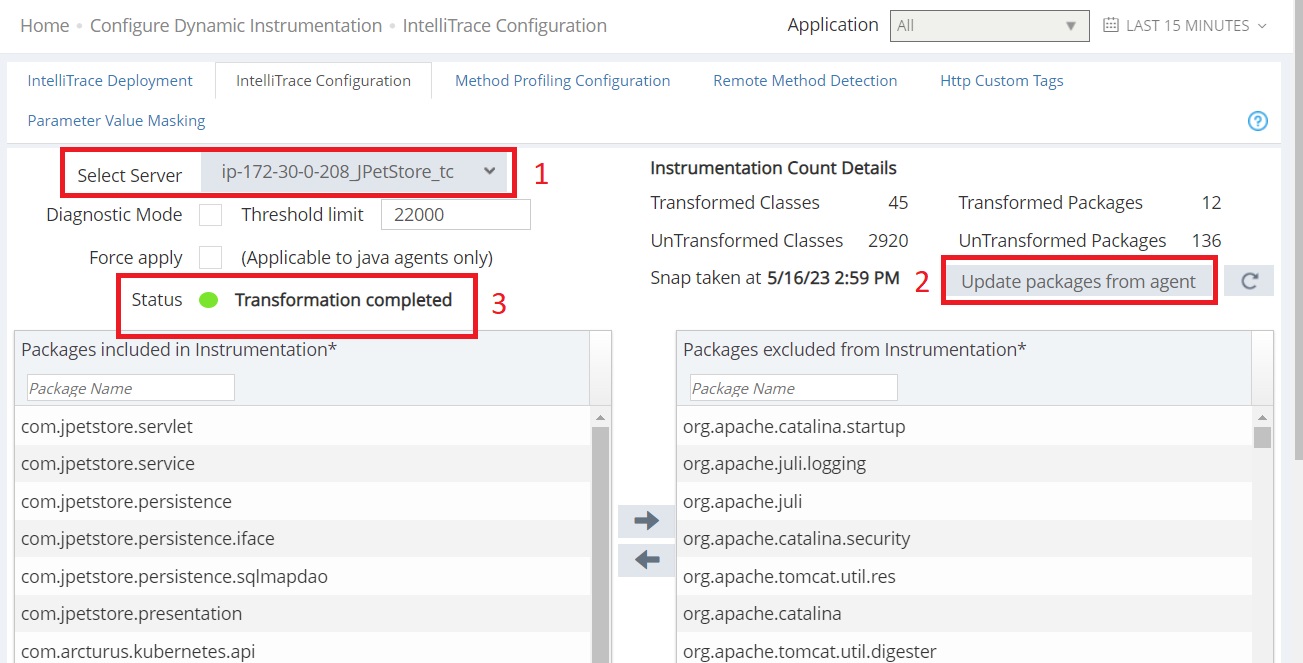
5. Select the Server from the server dropdown menu and click the Update Packages from Agent button. Then, wait for 2 minutes. Once the transformation is complete, the status field will display Transformation completed message. If the message "Transformation in progress" is displayed, please check again after 10 minutes.
6. After the Transformation completed message appears, select all the packages on the left hand side and move them to the right hand side.
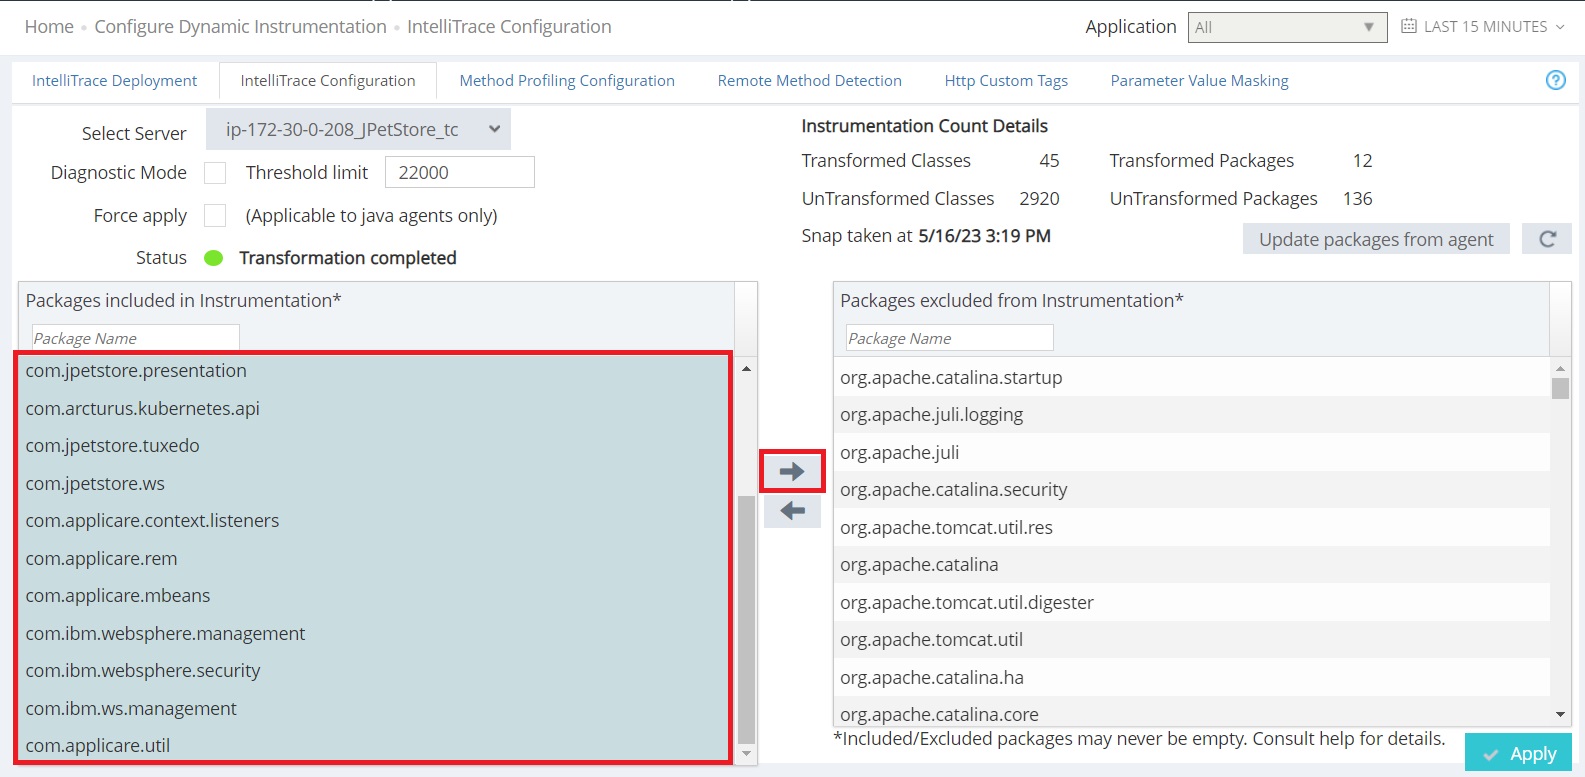
7. Click the Apply button to proceed.
8. Restart the server after waiting for two minutes.