Configure SMTP for Gmail

Check this against your version

This article was last updated on Sep 13, 2024, before Applicare 10.0 was released (Jun 19, 2026), and has not been re-checked for Applicare 10.0. Confirm the steps in your environment or contact Support.

Step 1: Log in to your Gmail account.

Step 2: Click on your Google account icon and select Manage your Google Account.
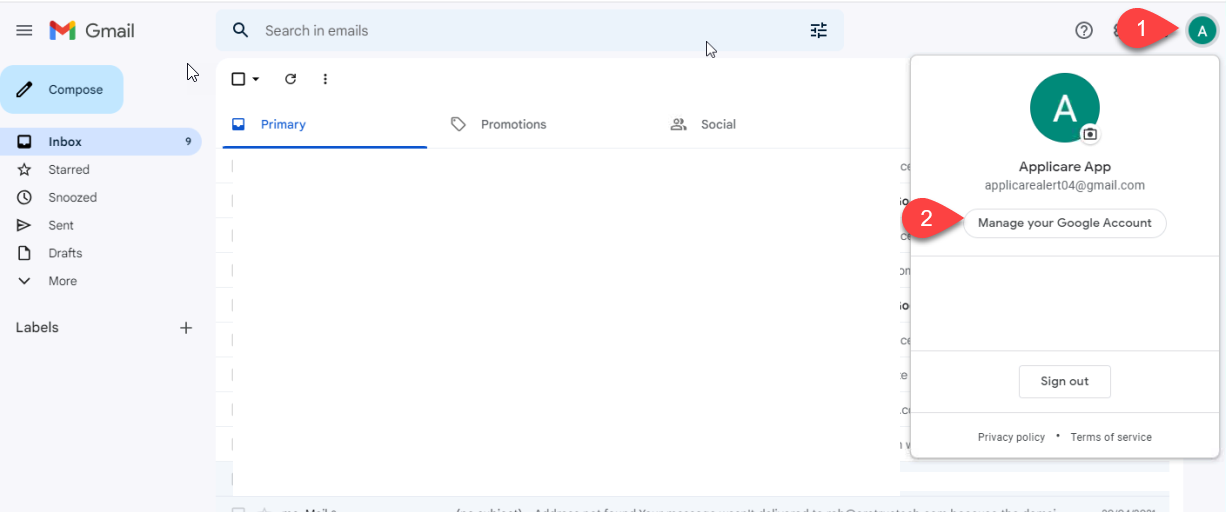
Screenshot 1 — Configure SMTP for Gmail

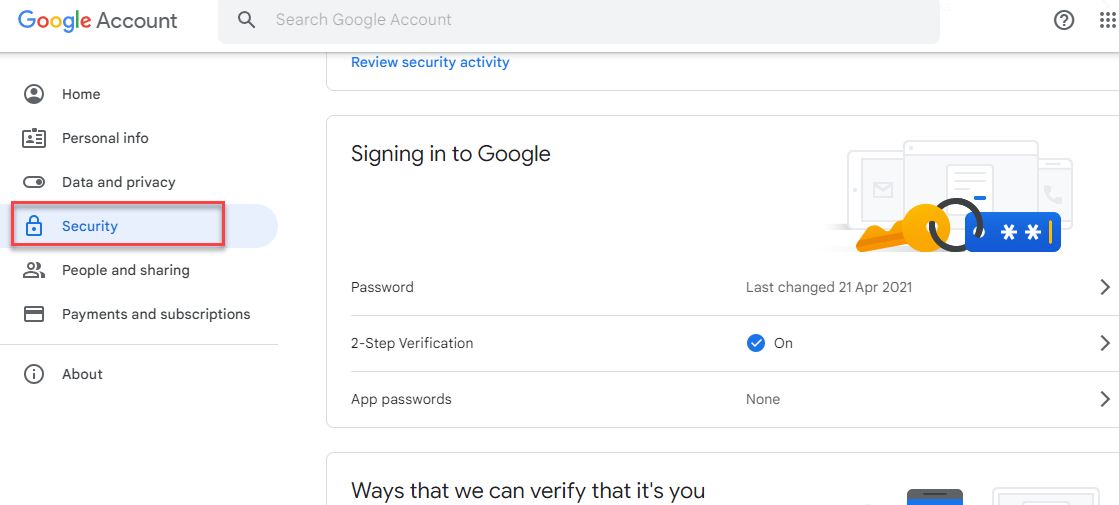
Step 3: Click on the Security option on the left side.
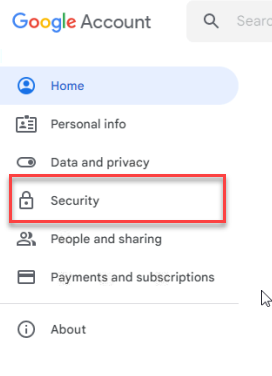
Screenshot 2 — Configure SMTP for Gmail

Step 4: Click on 2-Step Verification.
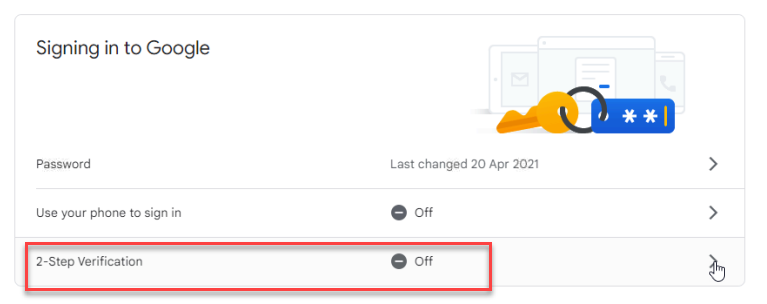
Screenshot 3 — Configure SMTP for Gmail

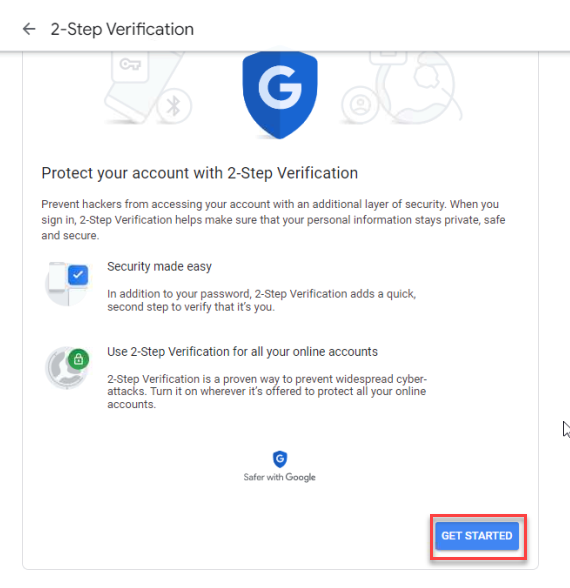
Click the "Get Started" button.

Screenshot 4 — Configure SMTP for Gmail

Step 5: Log in again using your Gmail password and verification code.

Step 6: Verify your mobile number and click on Next button.
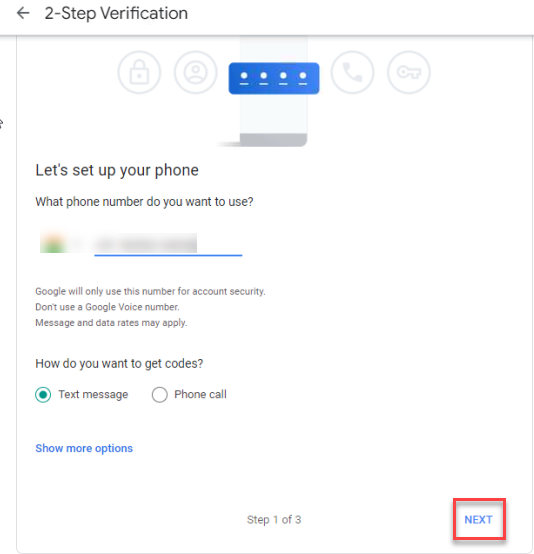
Screenshot 5 — Configure SMTP for Gmail

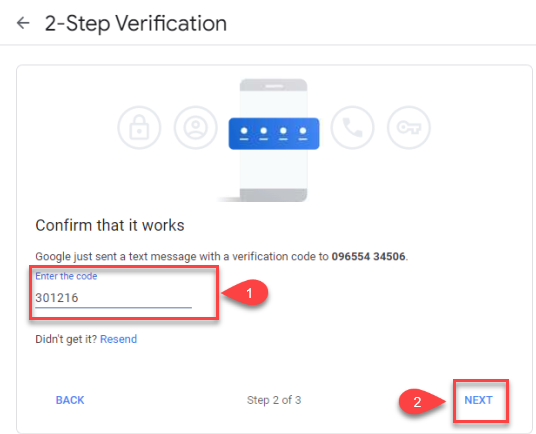
Step 7: Enter the verification code and click on the Next button.
Screenshot 6 — Configure SMTP for Gmail

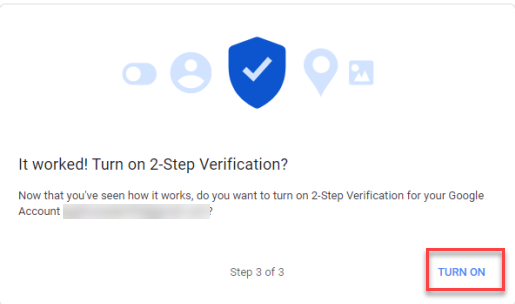
Step 8: Click the Turn On button.

Screenshot 7 — Configure SMTP for Gmail

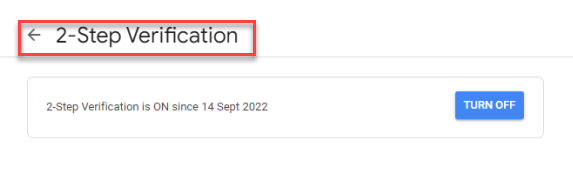
Click on 2-Step Verification to access the Gmail security screen.
Screenshot 8 — Configure SMTP for Gmail

Screenshot 9 — Configure SMTP for Gmail

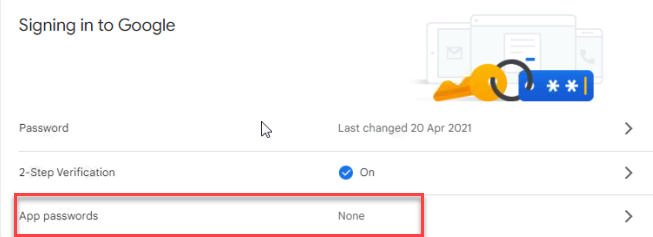
Step 9: Click on App password

Screenshot 10 — Configure SMTP for Gmail

Step 10: Log in again your Gmail password and verification code.

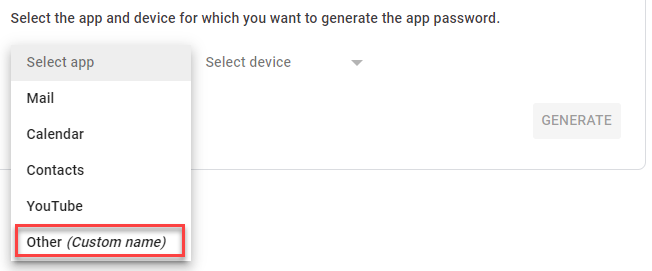
Step 11: From the Select app dropdown menu, choose the "other (custom name)" option.
Screenshot 11 — Configure SMTP for Gmail

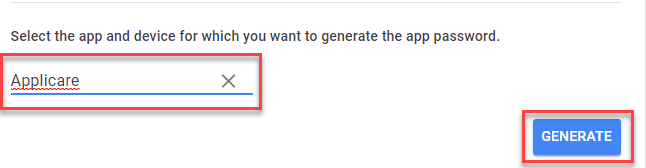
Step 12: Enter "Applicare" name as the App name and click the Generate button.
Screenshot 12 — Configure SMTP for Gmail

Step 13: Copy the generated app password and save it in a file. This app password will be used as the email password in the SMTP configuration.
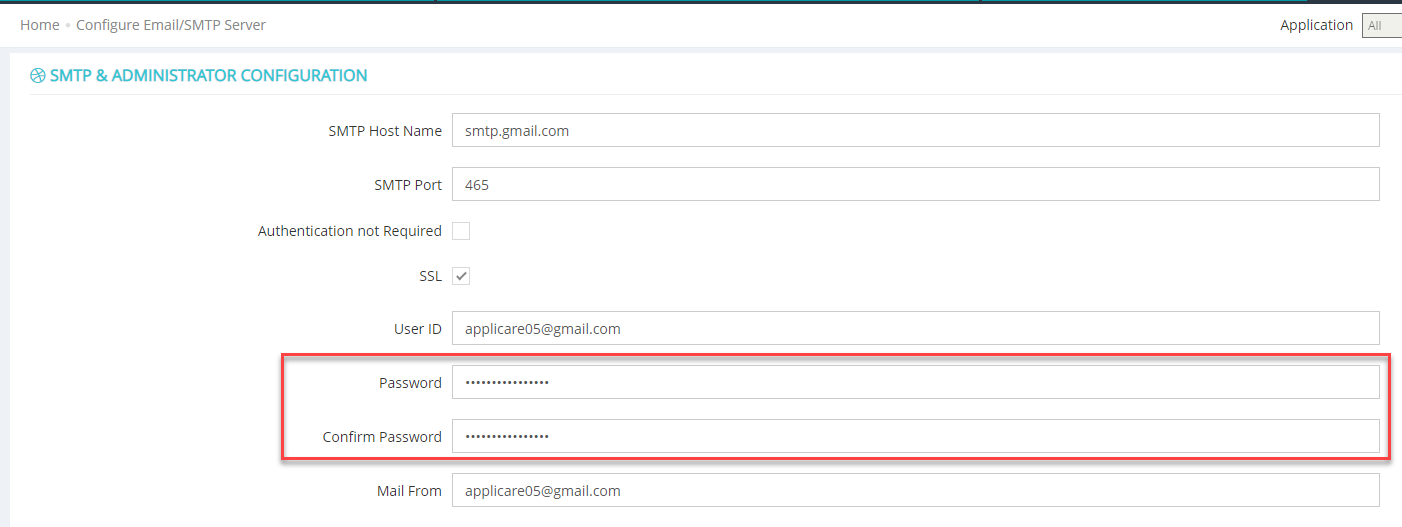
Screenshot 13 — Configure SMTP for Gmail

Monitoring with Applicare

Was this article helpful?

Votes and follows are kept by Zendesk, so they need a Help Center account. These buttons open this article there.

Opens Zendesk · needs internet and sign-in

Still stuck? Contact support